Water Damage Assessment: The $10K Mistake
- Wolfe McNeel
Your Ceiling’s Sagging. A Water Damage Assessment Could Save You $50,000.
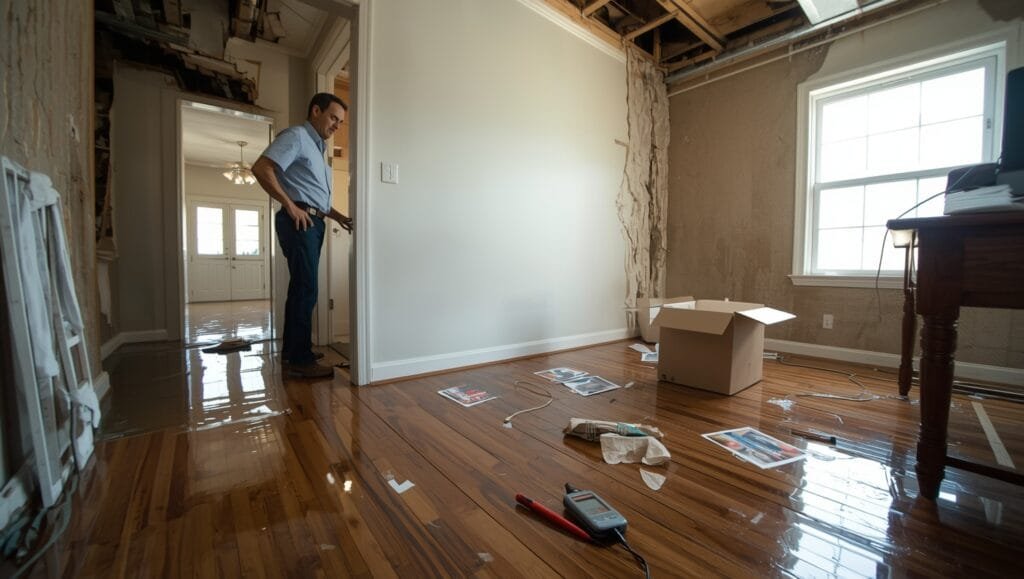
You walk into your bedroom and notice the drywall above your bed is soft to the touch—almost spongy.
Your heart sinks.
You know water’s been sitting up there, maybe for weeks, and you have no idea how bad it really is.
That’s where a water damage assessment comes in.
It’s not just about finding wet spots.
A proper assessment tells you exactly what you’re dealing with: how much water got in, where it traveled, what materials got compromised, and—most importantly—what it’s going to cost to fix.
One homeowner in Rochester called JetDry after noticing discoloration on her living room ceiling.
She thought it was a small leak from her roof.
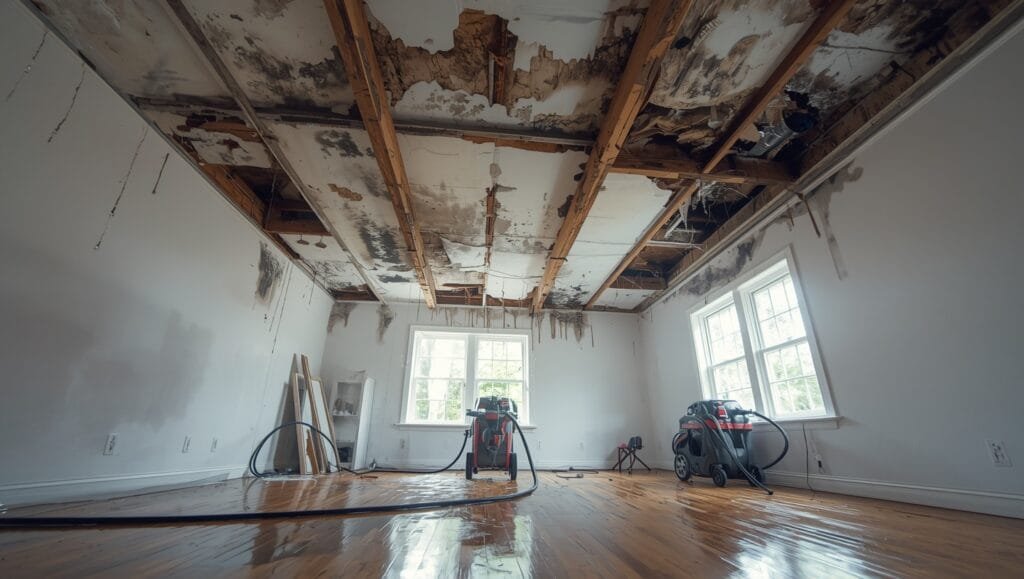
The assessment revealed water had already penetrated the attic, soaked into the insulation, and was starting to create conditions for mold growth.
Without that assessment, she would’ve ignored it for another month or two—and that could’ve cost her an extra $40,000 in structural repairs and mold remediation.
The difference between catching water damage early and catching it late is the difference between a $5,000 fix and a $50,000 nightmare.
Why a Water Damage Assessment Isn’t Optional—It’s Insurance for Your Sanity
Water damage isn’t always obvious.
You might see a water stain on the ceiling and think, “That’s the extent of it.”
But water travels.
It wicks into walls, soaks insulation, creeps into crawl spaces, and hides behind baseboards where you can’t see it.
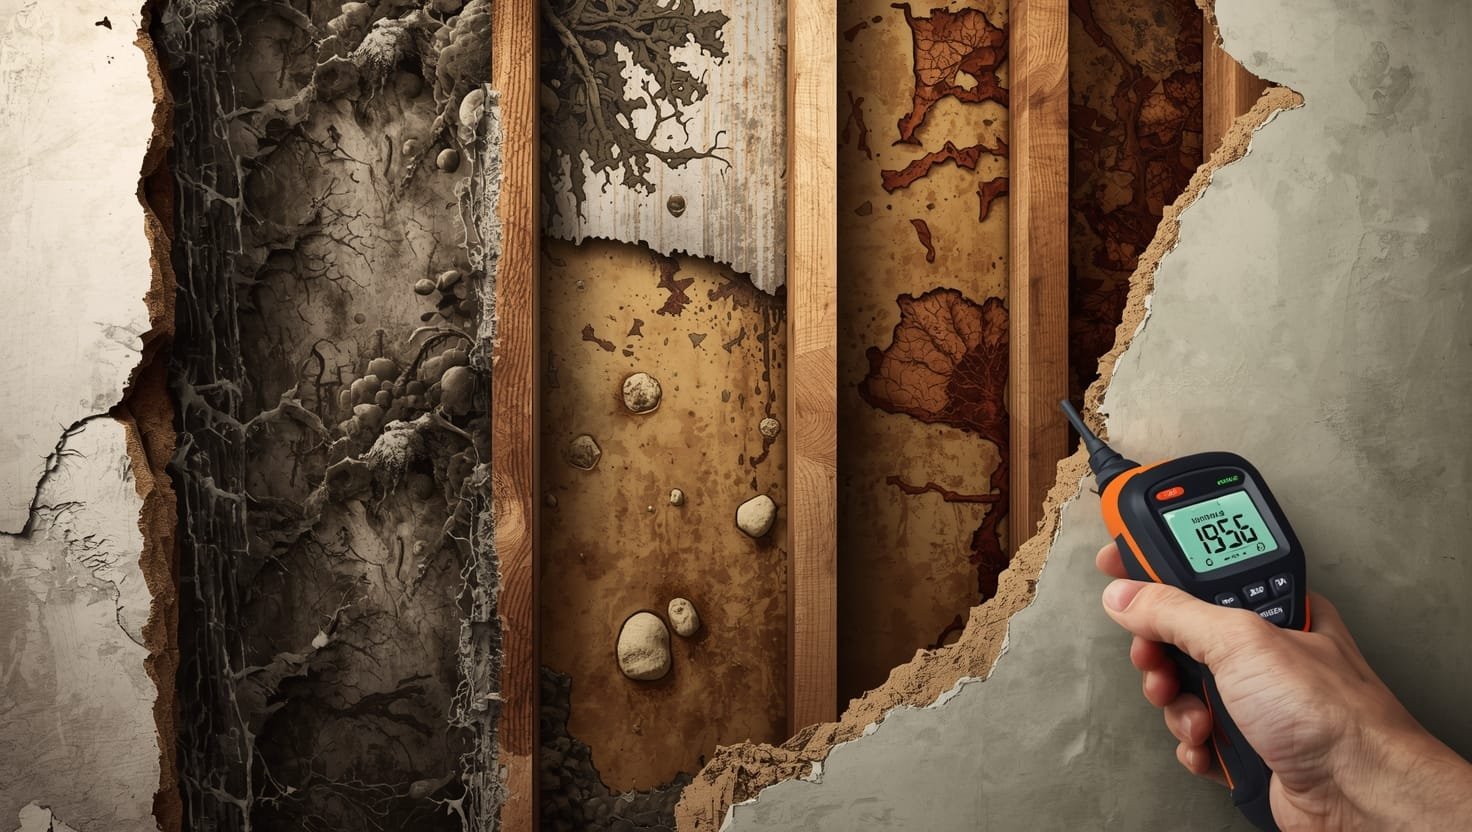
A water damage assessment is a thorough inspection that uses specialized equipment to find water where your eyes can’t.
Moisture meters detect hidden moisture in drywall and wood framing.
Thermal imaging cameras show temperature differences that reveal wet areas behind walls and ceilings.
Professional assessors know where water likes to hide—and they know what to look for.
Here’s what separates a real assessment from a guess:
- Visual inspection of all affected areas—walls, ceilings, floors, and structural components.
- Moisture readings taken at multiple depths to track how far water penetrated.
- Identification of affected materials—drywall, wood, insulation, flooring, baseboards.
- Detection of mold growth or conditions that could lead to mold (moisture + time = mold, and it happens fast).
- A written report that documents everything—what’s damaged, what needs to be removed, and what can be salvaged.
- Cost estimation so you’re not blindsided by repair bills.
Bottom line: An assessment finds hidden damage before it becomes a $50,000 problem.
The Hidden Costs Nobody Talks About
Most people think water damage repair is just about drying things out and replacing wet drywall.
Wrong.
If water sits for more than 24 to 48 hours, mold starts to grow.
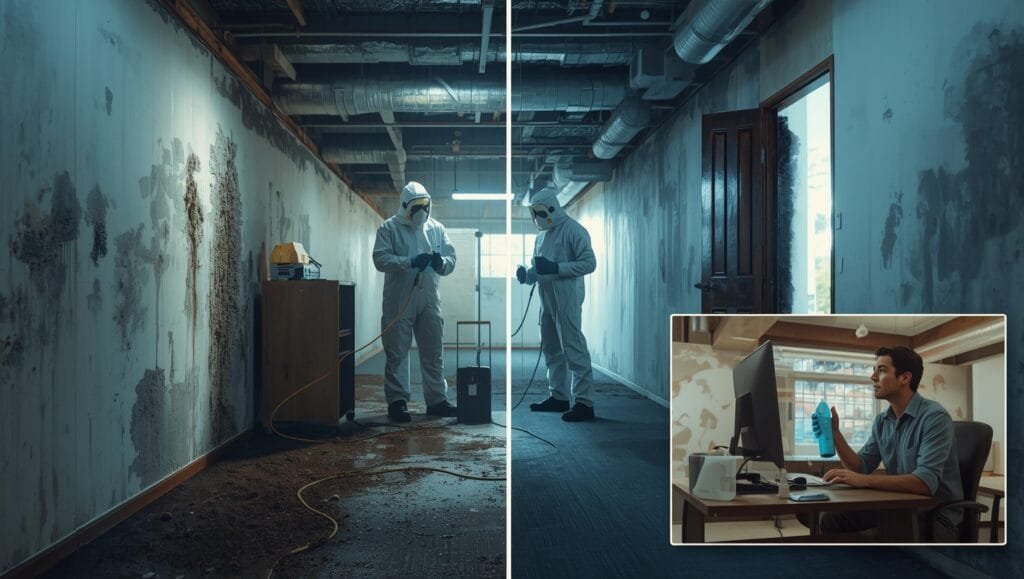
If mold grows, you’re looking at mold remediation services—which means containment, specialized removal, and air quality testing.
That alone can run $2,000 to $10,000 depending on how much mold is present.
Then there’s structural damage.
If water got into the framing, you might need to replace floor joists, wall studs, or even roof trusses.
That’s not a cosmetic fix—that’s structural work, and it’s expensive.
Insulation that’s been saturated loses its R-value and becomes a breeding ground for mold and bacteria.
It has to come out and be replaced.
Flooring—whether it’s hardwood, laminate, or tile—absorbs water and warps or deteriorates.
Some flooring can’t be saved and has to be completely replaced.
And then there’s the stuff nobody thinks about: your personal belongings.
Furniture, boxes, photos, documents—if they’re in a flooded basement, they’re often a total loss.
A water damage assessment catches all of this before you start ripping out walls and throwing away memories.
It tells you exactly what needs to happen next.
Bottom line: Hidden costs multiply fast—an assessment prevents thousand-dollar surprises.
How Water Travels (And Why You Need to Know)
Water doesn’t just sit where it lands.
It moves.
Understanding water’s path is critical to understanding the scope of damage.
Gravity pulls water down—so a leak in your upstairs bathroom doesn’t just damage the bathroom.
It travels down through the floor, into the walls, and into whatever’s below it.
If you have a basement, that’s where it pools.
If you have a crawl space, that’s where it collects and starts to cause structural rot.
Capillary action pulls water sideways.
A wet spot on one side of a wall can wick moisture to the other side—sometimes feet away from the original leak source.
This is why water damage is so hard to spot without proper equipment.
Air currents move moisture around.
If your HVAC system is running, it’s pushing air (and moisture) through your walls, ducts, and attic.
This is why air duct cleaning sometimes becomes necessary after water damage—moisture in your ducts creates mold colonies that spread spores throughout your entire house.
A professional water damage assessment maps this path.
It shows you where water came in, where it traveled, and where it settled.
That information determines what gets dried, what gets removed, and what gets replaced.
Bottom line: Water travels farther than you think—assessment reveals the full picture.
The Timeline Matters More Than You Think
Time is your enemy when water damage happens.
The longer water sits, the more damage occurs and the higher the cost.
First 24 hours: Drying is still possible.
Materials are wet but not yet compromised.
Mold hasn’t started growing yet.
24 to 48 hours: Mold begins to colonize.
Wood starts to swell.
Drywall begins to deteriorate.
Paint starts to bubble and peel.
48 to 72 hours: Structural damage accelerates.
Mold spreads aggressively.
Odors develop.
Materials that could’ve been salvaged now need replacement.
Beyond 72 hours: You’re dealing with a major restoration job—not just cleanup.
This is why getting a water damage assessment fast matters.
The assessment tells you how much time you have before costs spiral.
If water’s been sitting for 48 hours and mold’s already starting to show, you know you need to act immediately.
If it’s been less than 24 hours, you might still be able to save more of your belongings and materials.
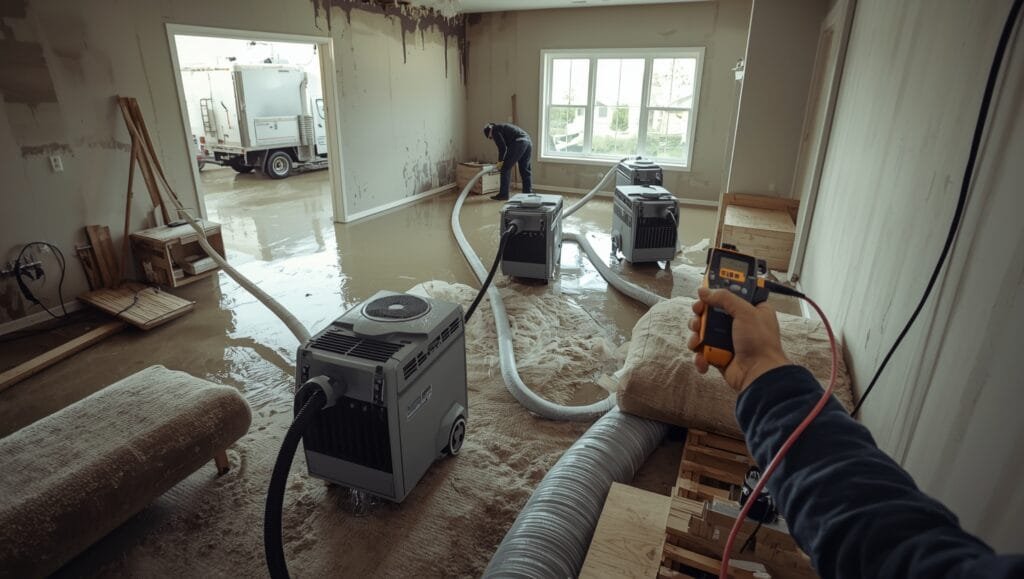
One homeowner in Rochester discovered water in her basement on a Friday afternoon.
She called JetDry for an emergency assessment that same day.
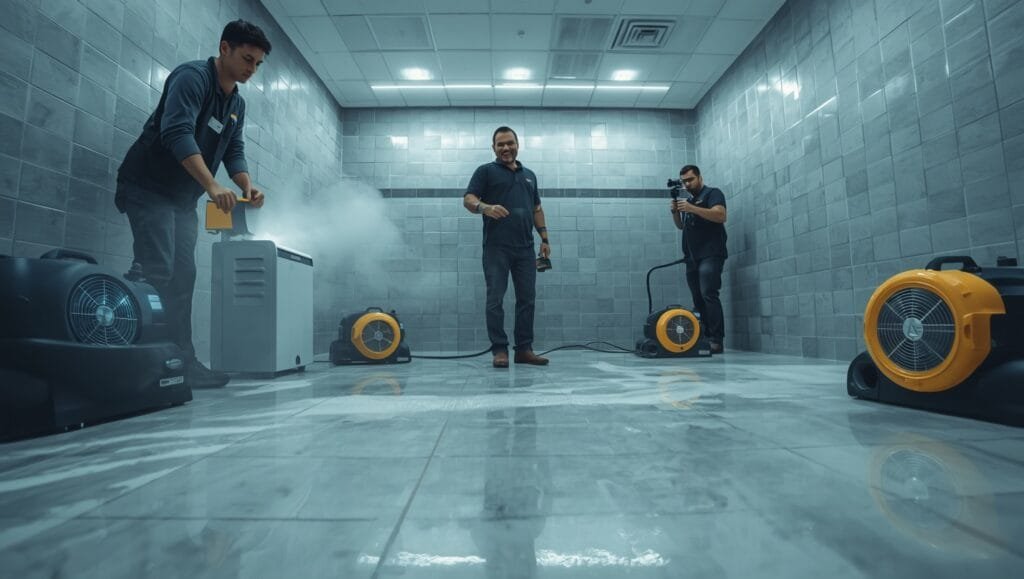
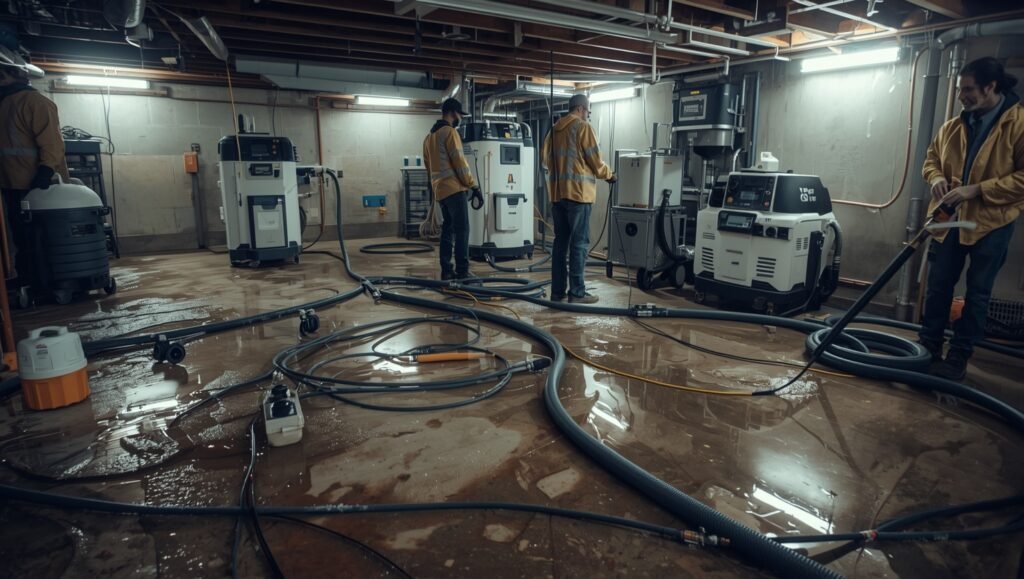
Within 4 hours, the team had extracted the water, set up industrial dehumidifiers, and identified that the damage was contained to the basement—the rest of the house was safe.
Because she didn’t wait, her repair bill was $8,000 instead of what could’ve been $30,000 if mold and structural damage had spread.
Bottom line: Speed saves money—assess within 24 hours of discovering water damage.
What an Assessment Actually Looks Like (Real-World Walkthrough)
You’re probably wondering what actually happens when someone shows up to do a water damage assessment.
It’s not complicated, but it’s thorough.
Step 1: Visual walkthrough.
The assessor enters your home and looks for obvious signs—wet carpet, stained drywall, discoloration on ceilings, soft flooring, peeling paint, or visible mold growth.
They take photos of everything.
They ask you questions: When did you first notice the water? Where did it come from? How much water was there? Have you already tried to clean it up?
Step 2: Moisture detection.
Using a moisture meter, the assessor tests drywall, wood, carpet, and insulation at various depths.
The meter tells them how much moisture is present—and whether it’s surface moisture or deep moisture that’s harder to dry out.
They map out the affected area, taking readings in concentric circles around the visible damage to find where moisture stops.
Step 3: Thermal imaging.
If there’s suspected water behind walls or in crawl spaces, a thermal imaging camera shows temperature differences.
Wet materials have different thermal signatures than dry materials.
This reveals hidden water damage that a visual inspection would miss.
Step 4: Mold screening.
The assessor looks for visible mold growth and sniffs for musty odors that suggest mold is already present.
If mold is suspected, they may recommend air quality testing or mold remediation services.
Step 5: Documentation.
All findings go into a written report.
The report includes photos, moisture readings, affected materials, and an estimate for repair costs.
This report is crucial—it’s what you’ll need for your insurance claim, and it’s what contractors will reference when they bid on repairs.
The whole process typically takes 1 to 3 hours depending on how large your home is and how extensive the damage is.
Bottom line: A proper assessment is systematic, documented, and gives you a clear roadmap for repairs.
Insurance Claims and Why Your Assessment Matters
Here’s something most people don’t realize: your insurance company isn’t going to take your word for it.
They want documentation.
They want evidence.
They want a professional assessment that proves you had water damage, shows what was damaged, and justifies the cost of repairs.
A water damage assessment provides exactly that.
The written report with photos, moisture readings, and cost estimates is what insurance adjusters use to approve or deny your claim.
Without a professional assessment, you might get denied because your claim is based on guesswork.
With one, you have proof—and proof is what gets claims paid.
Pro tip: Get the assessment done as soon as possible after water damage occurs.
Insurance companies like to see that you took action quickly.
It shows you weren’t negligent—you were responsible.
That makes them more likely to cover the cost.
Bottom line: Your assessment report is your insurance claim’s foundation—document everything.
DIY Assessment vs. Professional Assessment: Know the Difference
You might be tempted to do your own assessment.
You’ve got eyes, you’ve got a smartphone camera—how hard could it be?
Hard.
Really hard.
A DIY assessment will find obvious wet spots.
That’s it.
It won’t find moisture that’s traveled behind walls.
It won’t detect mold that’s starting to grow in hidden spaces.
It won’t tell you whether materials can be salvaged or need to be replaced.
And it won’t give you the documentation you need for an insurance claim.
Professional assessors have equipment you don’t have—moisture meters that measure moisture at different depths, thermal imaging cameras that see through walls, and the experience to know where water likes to hide.
More importantly, they have liability insurance.
If they miss something and you end up with a mold problem or structural damage later, they’re responsible.
You’re not on the hook.
That’s protection you don’t get with a DIY assessment.
And there’s one more thing: credibility.
When your insurance company sees a professional assessment report, they take it seriously.
When they see photos you took with your iPhone, they’re skeptical.
Bottom line: Professional assessments find hidden damage and hold up in insurance claims—DIY doesn’t.
The Cost of a Water Damage Assessment
You’re probably wondering: How much does this cost?
Most professional water damage assessments run between $200 and $500 depending on the size of your home and the complexity of the damage.
Some companies charge a flat fee.
Others charge per square foot.
Here’s the thing though: that $300 assessment could save you $20,000 in unnecessary repairs or mold remediation.
It’s not an expense—it’s an investment.
And if you end up hiring that company to do the restoration work, most will credit the assessment fee toward your total bill.
So you’re not really paying for the assessment—you’re paying a small upfront fee that gets applied to your restoration costs.
Bottom line: A $300 assessment prevents $20,000+ in hidden costs—do the math.
What Happens After the Assessment
Once you’ve got your assessment report, you have options.
You can use it to get quotes from multiple restoration companies.
You can submit it to your insurance company.
You can show it to your mortgage lender if you’re concerned about property value.
The assessment gives you clarity.
You know what’s damaged, you know what it’ll cost to fix, and you know how urgently you need to act.
From there, the next step is restoration—the actual work of extracting water, drying out your home, removing damaged materials, and rebuilding.
But that’s a conversation for after you know what you’re dealing with.
For now, the goal is simple: get an assessment, understand the scope of damage, and make an informed decision about what comes next.
Bottom line: Assessment reveals the damage; restoration fixes it—know one before you start the other.
Don’t Wait—Get a Professional Water Damage Assessment Today
Water damage doesn’t get better with time.
It gets worse.
Costs multiply.
Mold grows.
Structural damage accelerates.
If you’re dealing with water in your home—whether it’s from a burst pipe, a roof leak, flooding, or something else—you need a professional water damage assessment.
Not tomorrow.
Not next week.
Now.
Walt Latuik and the team at JetDry have been responding to water emergencies in Rochester for over 20 years.
They’ve seen every type of water damage, assessed thousands of homes, and saved countless homeowners from catastrophic repair bills.
They’re available 24/7 for emergency response, and they’ll have an assessor at your home quickly to determine exactly what you’re dealing with.
The longer water sits in your home, the more it costs to fix.
An assessment tells you how much time you have and what your next move should be.
Contact JetDry now for an emergency water damage assessment—and stop the damage before it becomes a financial disaster.

Beyond the Assessment: What Happens When Water Damage Assessment Reveals the Real Picture
You’ve got your water damage assessment report in hand.
You’ve read through the moisture readings, studied the photos, and looked at the cost estimate.
Now what?
This is where most homeowners feel stuck.
The assessment told you what’s wrong—but it didn’t tell you how to move forward without getting ripped off, how long repairs actually take, or what to expect when contractors show up at your door.
That’s what this part covers.
We’re talking about what happens after the assessment, how to use that report to your advantage, and the real decisions you’ll need to make to get your home back to normal.
Reading Your Assessment Report Like a Pro (Not Like Someone Guessing)
Most homeowners skim their assessment report and focus on one number: the repair estimate.
That’s a mistake.
Your assessment report is a roadmap—and if you understand it, you’ll know exactly what contractors should be doing, whether they’re cutting corners, and if they’re charging you fair prices.
The report should break down damage by category.
You’ll see things like “affected drywall: 400 square feet,” “saturated insulation: 200 square feet,” and “compromised flooring: 150 square feet.”
These numbers matter because they determine labor costs and material costs.
The moisture readings tell you how deep the water penetrated.
If readings show 30% moisture at 1 inch depth but only 15% at 3 inches, that’s good news—it means water didn’t travel as far as it could have.
If readings are high at multiple depths, water’s been sitting longer than you think, and restoration will take more time.
The mold assessment section is critical.
If the report says “no visible mold growth detected,” that’s one thing.
If it says “mold conditions likely to develop within 48 hours if not dried,” that’s urgent—you need restoration to start immediately, not next week.
Photos in the report serve as a baseline.
When contractors start work, ask them to take before-and-after photos at each phase.
Compare those to your assessment photos to make sure they’re actually removing what needs to be removed.
Bottom line: Your assessment report is your proof of damage—learn to read it like a contract.
Choosing the Right Contractor (Because Not All Are Created Equal)
Here’s the thing about water damage restoration: it’s not like hiring a plumber to fix a leak.
You’re hiring someone to make decisions about what stays and what goes, what can be salvaged and what needs removal.
A good contractor uses your assessment report as their starting point, not their ending point.
They might find additional damage once they start removing materials (this happens all the time), but they shouldn’t be surprised by what they find in the walls.
When you’re vetting contractors, ask them specific questions about your assessment.
Can they explain the moisture readings?
Do they understand why certain materials need to be removed versus dried?
Will they provide updates with photos as work progresses?
What’s their drying protocol—how long do they expect it to take, and what equipment will they use?
Red flag contractors are the ones who say things like “we’ll just dry it out and see what happens” or “we’ll remove everything to be safe.”
The first approach is reckless.
The second is wasteful and expensive.
A solid contractor—someone like the team at JetDry’s emergency water damage restoration services—will follow your assessment findings, explain their plan in writing, and stick to it unless new damage is discovered.
Also check references.
Call at least two previous customers and ask them this: “Did the contractor find hidden damage that wasn’t in the assessment, and if so, how did they handle the cost?”
That answer tells you everything about their integrity.
Bottom line: The right contractor uses your assessment as a blueprint—not a suggestion.
Understanding Drying Timelines (And Why Rushing It Costs More)
This is where patience actually saves money.
Most homeowners want their home dried out in a week.
That’s not realistic, and pushing for speed can create new problems.
Drying happens in phases, and each phase takes time.
First, you extract standing water (if there is any)—that’s hours, not days.
Then you set up industrial dehumidifiers and air movers to pull moisture from materials.
That’s where the timeline gets long.
The speed of drying depends on several factors: how much water was absorbed, what materials are affected, your home’s HVAC system, and weather conditions.
Drywall that’s 20% wet might dry in 3-5 days with proper equipment.
Drywall that’s 40% wet might take 2-3 weeks.
Insulation is slow.
If your insulation got wet, it’s usually easier to replace it than to dry it (and faster too).
But your assessment should have told you whether replacement is necessary.
Here’s what most people don’t understand: if you rush drying by cranking up heat and dehumidifiers, you might dry the surface while moisture stays trapped deeper in materials.
That moisture will cause mold growth weeks after the contractor leaves.
Then you’re paying for mold remediation on top of your original restoration bill.
Your contractor should give you a drying schedule—how many days they expect it to take, what equipment they’ll use, and how they’ll monitor progress.
Ask them to show you moisture readings every 2-3 days so you can see the progress.
Bottom line: Proper drying takes time—rushing it creates hidden mold problems later.
Salvaging vs. Replacing: The Decision That Affects Your Budget
Your assessment report should note which materials can potentially be salvaged and which should be removed.
But this is where homeowners often get surprised by contractor decisions.
Drywall that got wet is sometimes salvageable if it dried quickly and didn’t absorb too much water.
But if it’s been wet for more than 48 hours or shows signs of swelling, it’s a total loss.
Replacing 400 square feet of drywall (including labor) can run $2,000-$4,000.
Flooring is another big one.
Hardwood flooring that got wet often can’t be saved—water makes it warp permanently.
Laminate is almost always a total loss.
Tile can usually be saved, but the subfloor underneath might be compromised.
Carpet can sometimes be dried and saved if water was clean (not sewage) and drying started within 24 hours.
Insulation almost never gets salvaged.
Once it’s saturated, it loses its R-value and becomes a breeding ground for mold and bacteria.
Replacement costs depend on your home’s square footage and the type of insulation, but expect $1,000-$3,000 for a typical attic or wall cavity.
Baseboards are a gray area.
If they’re just wet on the surface, they might dry.
If water wicked up inside them, they’re usually removed and replaced.
The key is this: your assessment should have given you guidance on what can be saved.
When contractors start work, they might discover that something you thought could be salvaged actually needs replacement (this is normal and should be documented with photos).
But they shouldn’t be making arbitrary decisions about what stays and goes—they should be following the assessment’s recommendations and explaining any deviations.
Bottom line: Salvage decisions should be based on your assessment—get it in writing before work starts.
Managing Costs During Restoration (Because “Unexpected Expenses” Are Killing Your Budget)
Here’s where a lot of homeowners get blindsided.
They get an estimate from the assessment, hire a contractor, work starts, and suddenly there are “additional costs” that weren’t in the original plan.
Some of these are legitimate.
Your contractor removes the drywall and finds the studs are rotting—that’s new damage that requires additional work.
That should be documented, photographed, and approved by you before the contractor proceeds.
Other costs are contractors padding the bill.
They’re charging extra for things that should have been included, or they’re suggesting unnecessary work.
To protect yourself, get everything in writing before work starts.
Your contractor should provide a detailed scope of work that lists exactly what will be removed, what will be dried, and what will be replaced.
It should include labor costs, material costs, and equipment rental costs.
Ask about their change order process.
If unexpected damage is found, how will they notify you?
Will they send photos?
Will they get your approval before proceeding?
Will they charge extra, or is there a contingency budget built into the estimate?
Also clarify what’s included in the estimate.
Does it include drying time?
Does it cover debris removal?
Are they charging separately for equipment rental?
Some contractors bundle everything; others nickel-and-dime you on every little thing.
One Rochester homeowner we know hired a contractor without clarifying the scope.
When they found additional mold in the crawl space (which should have been discovered during the assessment), the contractor wanted to charge $5,000 extra.
A clear change order process would have prevented the surprise.
Bottom line: Get a detailed written scope before work starts—no surprises, no arguments later.
The Hidden Timeline: How Long Does Restoration Actually Take?
Your assessment might say “restoration estimated at 2 weeks.”
But that’s not how it actually works in the real world.
Restoration timelines depend on several factors, and most homeowners underestimate them.
Here’s what actually happens:
Week 1: Water extraction, equipment setup, initial drying begins.
Contractors are pulling out wet materials if necessary.
You’re not living in the affected area yet.
Week 2-3: Drying continues.
Moisture readings are taken every few days.
If everything’s on track, you might start to see progress.
Week 3-4: Once materials are dry (and moisture readings confirm it), removal of damaged materials begins.
Drywall comes out, insulation is replaced, flooring might be removed.
Week 4-6: Reconstruction.
New drywall goes up, insulation is installed, flooring is replaced.
Painting happens.
This is the longest phase.
Total timeline for a moderate water damage restoration: 4-6 weeks.
For severe damage: 8-12 weeks.
That’s if everything goes smoothly.
If contractors find structural damage, if mold remediation is necessary, or if materials are backordered, it takes longer.
Ask your contractor for a realistic timeline broken down by phase.
Don’t accept vague answers like “a few weeks.”
Get specific dates (or date ranges) for each phase.
Bottom line: Realistic restoration takes 4-6 weeks minimum—plan accordingly.
Dealing With Your Insurance Company (And Using Your Assessment to Get Paid)
This is where your assessment report becomes gold.
Insurance companies want documentation, and your assessment is exactly that.
When you file a claim, submit your assessment report along with your claim paperwork.
Include the photos, the moisture readings, and the cost estimate.
This gives the insurance adjuster a clear picture of what happened and what needs to be fixed.
Insurance adjusters will often do their own inspection, but they’re usually looking at your assessment report to understand the scope of damage.
If your assessment is thorough and professional, the adjuster’s job becomes easier—and easier means faster approval.
One thing to watch: your insurance company might send their own contractor to do repairs, or they might approve you to hire your own.
If you get to choose, use a contractor who understands insurance claims and knows how to work with adjusters.
They’ll document everything properly so you don’t get denied for lack of evidence.
Also be aware of your deductible.
Most homeowners insurance has a deductible of $500-$1,000 for water damage (some have higher deductibles).
That means you pay that amount, and insurance covers the rest.
Make sure your contractor’s estimate accounts for this.
If your insurance denies coverage (which happens sometimes, depending on the cause of damage), your assessment report is your defense.
It proves you had damage and that it wasn’t negligence on your part—it was a covered event.
Bottom line: Your assessment report is your insurance claim’s strongest evidence—use it aggressively.
Preventing Future Water Damage (Because It’ll Happen Again If You’re Not Careful)
Once you’ve dealt with water damage once, you know how much it sucks.
The question is: how do you prevent it from happening again?
Your assessment should have identified the source of the water.
Was it a roof leak?
A burst pipe?
A failed sump pump?
Flooding from outside?
Whatever it was, that’s what you need to fix first—or you’re just setting yourself up for round two.
If it was a roof leak, get the roof inspected and repaired.
If it was a pipe burst, have a plumber check your plumbing system for other weak spots.
If it was sump pump failure, consider installing a high-water alarm for your sump pump so you know if it fails before water starts pooling.
Beyond fixing the source, there are preventative measures you can take.
Install an automatic water shut-off valve on your main water line so if a pipe bursts, water stops flowing automatically.
Install water leak detection sensors in high-risk areas (under the kitchen sink, near the water heater, in the basement).
Clean your gutters regularly so water doesn’t back up and leak into your attic.
Seal cracks in your foundation so water doesn’t seep in during heavy rain.
These preventative measures aren’t sexy, but they’re cheap compared to a $50,000 restoration bill.
Bottom line: Fix the source of damage first—then install preventative measures to avoid round two.
Frequently Asked Questions About Water Damage Assessment and Restoration
How long does a water damage assessment take?
A typical assessment takes 1-3 hours depending on your home’s size and damage complexity.
The assessor will inspect all affected areas, take moisture readings, and document findings with photos.
Will my insurance cover the assessment cost?
Most homeowners insurance doesn’t cover the assessment itself, but it covers the restoration work.
Some contractors credit the assessment fee toward your restoration bill if you hire them.
What if the assessment finds damage I didn’t know about?
That’s exactly why assessments exist.
Hidden damage (like moisture behind walls or in crawl spaces) is common and often becomes visible only with professional equipment.
Can I start restoration before the assessment is done?
Not recommended.
You might remove materials that could have been salvaged, or miss damage that needs attention.
Get the assessment first, then start restoration based on the findings.
What if my contractor finds damage that wasn’t in the assessment?
This happens.
The contractor should document it with photos, explain why it needs to be addressed, and get your approval before proceeding.
It should be handled through a change order, not added to your bill without discussion.
How do I know if my restoration is complete?
Your contractor should provide final moisture readings showing all materials are at normal levels (typically under 15% for most materials).
They should also provide a final walkthrough where you inspect the work and sign off.
Get Your Water Damage Assessment Today—Before Hidden Damage Becomes Your Problem
You now know what a water damage assessment is, why it matters, and how to use it to navigate restoration without getting ripped off.
But knowledge only works if you act on it.
Water damage gets worse every day it sits.
Mold grows.
Structural damage spreads.
Costs multiply.
Walt Latuik and the team at JetDry have been helping Rochester homeowners understand and recover from water damage for over 20 years.
They’re available 24/7 for emergency response, and they’ll get an assessor to your home fast to give you the clarity you need.
Whether you’re dealing with a obvious leak or suspicious damp spots you can’t explain, a professional water damage assessment is your first step to protecting your home and your wallet.
Contact JetDry now for an emergency water damage assessment—and get answers today instead of surprises tomorrow.
The Silent Killer in Your Walls: What Happens When Water Damage Assessment Misses the Real Problem
Your water damage assessment came back clean.
No structural issues.
No mold detected.
You breathe a sigh of relief.
Then, three weeks later, you notice a musty smell creeping through your bedroom.
Your kid starts coughing at night.
You go back to that assessment report and realize—it missed something critical.
This happens more often than you’d think.
Not because assessors are bad at their jobs, but because water damage doesn’t always play by the rules.
It hides.
It spreads.
It creates conditions for problems that develop long after the initial inspection.
This is what most homeowners don’t understand about the assessment phase: getting a report is just the beginning.
What matters is what you do with that information—and what problems emerge after the drying starts.
Why Assessments Can Miss Hidden Dangers (Even Good Ones)
A water damage assessment is a snapshot in time.
It tells you what’s wet and where the water traveled on the day of the inspection.
But water damage is a living, moving problem that evolves over days and weeks.
Mold doesn’t grow instantly.
It needs moisture, warmth, and time—usually 24 to 72 hours before visible colonies form.
An assessment done on day one might show zero mold because the conditions haven’t been right yet.
By day four, you’ve got a full infestation in spaces the assessor couldn’t see.
The same goes for secondary damage.
Water wicks into materials slowly.
A wall that looks salvageable on day two might be completely compromised by day five.
Wood rot doesn’t happen overnight—it’s a process that accelerates as moisture sits.
Assessors also can’t see inside cavities or sealed spaces without destructive methods.
They can use thermal imaging and moisture meters, but those tools have limits.
A wet cavity inside a wall might not show up on a meter reading if the moisture is concentrated deep inside the space.
And here’s the thing nobody talks about: assessors work with the information available at that moment.
If you’ve already started cleanup yourself—moving wet furniture, opening windows, running fans—you’ve changed the conditions.
The moisture distribution isn’t natural anymore, so readings might be misleading.
Bottom line: Assessments capture the moment, not the months ahead—problems develop after inspection.
The Post-Assessment Phase: When Real Damage Emerges
Once drying starts, contractors often find things the assessment didn’t catch.
This is normal, not a failure of the assessment.
A contractor in Rochester was drying out a basement after a sump pump failure.
The assessment said the damage was limited to the basement floor and lower walls.
Once they started removing baseboards, they found water had wicked up inside the wall cavity—nearly eight feet up in some places.
The assessment’s moisture meter readings at the surface didn’t catch it because the meter wasn’t testing deep enough into the wall structure.
This is why the emergency water damage restoration process includes a reassessment once materials start coming out.
Good contractors don’t just follow the assessment report blindly.
They inspect as they work, document new findings with photos, and adjust their plan accordingly.
The cost implications matter here.
If your assessment estimated $8,000 in repairs but the contractor finds structural rot that adds another $4,000, that’s a change order situation.
This shouldn’t blindside you if the contractor has a clear change order process in place.
What separates professional restoration companies from cut-rate operators is transparency during this phase.
They take photos of unexpected damage.
They explain why it needs attention.
They get your approval before proceeding.
They don’t just pad the bill and call it “additional findings.”
Bottom line: Expect the unexpected—professional contractors document new damage with photos before charging for extra work.
The Mold Timeline Problem: Why You Can’t Trust Day-One Assessment Results
This is critical to understand: an assessment showing “no visible mold” on day one doesn’t mean you’re safe from mold.
It means mold hasn’t colonized yet.
Mold spores are everywhere—in the air, in your carpet, on your furniture.
They’re dormant until conditions get right: moisture, warmth, and time.
When water sits, those conditions develop fast.
Here’s what the timeline actually looks like:
Hours 0-24: Moisture is present but mold isn’t growing yet.
Assessment shows no mold.
You think you’re good.
Hours 24-48: Mold spores start to germinate in wet areas.
You can’t see it yet, but it’s happening.
Assessment is now outdated.
Hours 48-72: Mold colonies become visible—fuzzy patches, discoloration, musty smells.
Now you’ve got a problem that wasn’t in the assessment.
The catch: if drying didn’t start immediately or if humidity levels stayed high, mold accelerates.
If the contractor set up dehumidifiers wrong, mold grows even faster.
One homeowner had an assessment done on a Friday after a pipe burst.
The assessment said “no mold detected, drying recommended.”
The contractor didn’t start work until Monday—three days later.
By the time they arrived, mold was already visible in the attic.
The homeowner ended up needing mold remediation services on top of water damage restoration.
This is why the timing between assessment and restoration matters so much.
A 48-hour gap can be the difference between a $5,000 job and a $15,000 job.
Bottom line: Day-one mold assessment is worthless—mold grows after inspection, not before it.
Materials That Fail After the Assessment (But Looked Fine During It)
Certain materials fail in slow motion.
An assessment might say they’re salvageable, but by the time restoration starts, they’re toast.
Drywall is the biggest culprit.
When wet drywall starts to dry, it doesn’t dry evenly.
The surface dries first while the interior stays wet.
This creates conditions for mold growth inside the drywall—something that won’t show up until you’re already in the restoration phase.
The assessment might say “drywall is wet but can dry in place.”
The contractor starts drying.
A week later, they cut into the wall to check moisture levels and find black mold colonies inside the drywall.
Now it has to come out, not because the assessment was wrong, but because conditions changed during drying.
Insulation is similar.
Saturated insulation takes forever to dry.
If the assessment recommends drying it in place, that can work—but only if the drying environment is perfect.
One humidity spike, one day without dehumidifiers running, and mold takes over inside the insulation.
Wood framing is the scariest one.
Wood can absorb a ton of water without showing obvious signs.
The assessment might test the surface and say it’s fine.
But if moisture penetrated deep into the wood, rot starts developing weeks later—long after the assessment.
This is why contractors keep checking moisture levels throughout restoration.
They’re not being paranoid.
They’re protecting you from discovering mold or rot three months after the job is “done.”
Bottom line: Materials fail after assessment—ongoing moisture monitoring prevents hidden disasters.
The Equipment Factor: Your Drying Setup Determines If Problems Emerge
Here’s something the assessment report doesn’t control: the quality of drying equipment and how it’s used.
A cheap contractor might set up one dehumidifier and a couple of box fans.
A professional outfit sets up industrial-grade equipment with air movers positioned to push moisture toward dehumidifiers, not just blow it around.
The difference matters enormously.
Poor equipment setup means moisture lingers in hidden spaces.
Moisture lingering means mold grows.
Mold growing means you’ve got a whole new problem that wasn’t in the assessment.
Dehumidifiers also need to be sized correctly for the space.
A 30-pint dehumidifier might be fine for 500 square feet.
Throw it in a 2,000 square-foot basement and it’s overwhelmed—it can’t keep up with moisture removal.
The contractor should explain their drying strategy: what equipment they’re using, how it’s positioned, how long they expect drying to take, and how they’ll monitor progress.
If they can’t explain it, they don’t have a real plan.
Walt and the team at JetDry don’t guess on drying.
They spec out equipment based on the space size, moisture levels, and material types.
They check progress regularly.
They adjust if things aren’t drying as expected.
This approach prevents the mold and structural damage that emerges from sloppy drying.
Bottom line: Poor drying equipment creates mold problems after assessment—demand professional-grade setup.
What You Should Do After Getting Your Assessment Report
Don’t just file the assessment away and wait for a contractor to call.
Use it actively.
First, understand what it says.
Read the moisture readings.
Look at the affected areas in the photos.
Check the timeline—how long has water been present?
The longer it’s been there, the higher the risk of hidden damage.
Second, start drying immediately.
Every hour water sits is an hour closer to mold growth.
If your contractor can’t start work within 24 hours, set up your own equipment in the meantime.
Fans and dehumidifiers from a rental shop cost $50-100 per day.
That’s cheap insurance against mold.
Third, get a second opinion if anything feels off.
If the assessment says damage is limited but you smell mold or notice discoloration spreading, call another contractor.
Get their take on what they’re seeing.
It’s free, and it might catch something the first assessment missed.
Fourth, stay involved during restoration.
Ask the contractor to show you moisture readings regularly.
Ask them to take before-and-after photos of each phase.
Ask them to explain any changes to the original plan.
This isn’t micromanaging—it’s protecting your investment.
Bottom line: Active involvement after assessment prevents costly surprises during restoration.
The Insurance Claim Complication: When Assessment and Reality Diverge
Here’s where things get messy.
You file an insurance claim based on the assessment.
Insurance approves it based on the assessment.
Then during restoration, new damage emerges that wasn’t in the assessment.
If you try to add it to the claim later, insurance might deny it—saying it should have been caught in the original assessment.
If you pay for it out of pocket, you’re stuck with thousands in unexpected costs.
The way to avoid this: be explicit with the insurance company about what the assessment covered and when it was done.
Ask them if they’ll cover additional damage discovered during restoration (most do, as long as it’s documented and reasonable).
Also make sure your contractor is experienced with insurance claims.
They know how to document new findings in a way that insurance accepts.
They know what photos and reports to provide.
They know how to justify change orders in language insurance adjusters understand.
A contractor who’s never dealt with insurance claims might not know how to present new damage in a claimable way—and you’ll end up paying for it.
Bottom line: Clarify coverage for post-assessment damage before restoration starts—avoid claim denials later.
Common Questions About What Happens After Water Damage Assessment
Can mold grow between the assessment and when restoration starts?
Absolutely, especially if there’s a delay of more than 24 hours.
Mold needs moisture and time—both are present after water damage.
This is why starting drying immediately (even with rental equipment) matters.
What if the contractor finds damage that wasn’t in the assessment?
It should be documented with photos, explained to you, and approved via a change order before work proceeds.
Don’t let contractors surprise you with extra costs after the fact.
Should I hire the same company that did the assessment to do the restoration?
Not necessarily, but there are advantages.
They already know the damage and won’t be starting from scratch.
They’re invested in getting it right since they did the assessment.
Just make sure they have a solid change order process if new damage emerges.
How often should moisture be checked during drying?
Every 2-3 days minimum.
More frequent checks (daily) are better for larger or more complex jobs.
Ask your contractor for a moisture monitoring schedule before work starts.
What happens if drying takes longer than the assessment predicted?
It happens—weather, humidity, material type, or equipment issues can extend timelines.
Your contractor should communicate this and explain why.
They shouldn’t just keep billing you without explanation.
Don’t Let Hidden Damage Wreck Your Wallet—Get Expert Guidance From Day One
A water damage assessment is your starting point, not your finish line.
What happens after that assessment—how quickly you start drying, what equipment you use, how closely you monitor progress—determines whether you catch problems early or discover them months later when they’re expensive.
Walt Latuik and the team at JetDry have walked through thousands of homes in Rochester and beyond.
They’ve seen what happens when assessments are ignored, when drying is delayed, when contractors cut corners.
They’ve also seen what happens when you act fast and follow a solid plan—water damage becomes a manageable problem instead of a financial disaster.
If you’re dealing with water damage right now, don’t just get an assessment and hope for the best.
Get a professional assessment, understand what it says, and make sure restoration starts immediately with proper equipment and ongoing monitoring.
Contact JetDry now for a comprehensive water damage assessment and restoration plan—and get the guidance you need to prevent problems from emerging after the work is done.