Ceiling Leak? Here’s What It Costs You
- Wolfe McNeel
You Come Home and Your Ceiling is Sagging—Now What?
A ceiling leak isn’t just an annoyance.
It’s a warning sign that water’s already doing damage you can’t see.
By the time you spot that brown stain or feel that soft drywall, moisture has likely been working behind the scenes for days—sometimes weeks.
The real cost isn’t always what you pay to fix the leak itself; it’s what happens if you wait.
One homeowner in Rochester called us after ignoring a small ceiling leak for three weeks.
What started as a $2,000 repair turned into a $15,000 restoration job when mold took hold in the attic and drywall.
He could’ve stopped it cold with one phone call.
A ceiling leak demands speed and clarity.
You need to know what’s causing it, how bad it really is, and what your next move should be.
This guide walks you through all of it—so you can act before a small problem becomes a financial nightmare.
Why Ceiling Leaks Are Deceptive (And Dangerous)
Water doesn’t just sit where you see it.
It travels.
It pools in cavities between walls and floors.
It soaks into insulation, wood framing, and the drywall itself—all places where you can’t see what’s happening.
Mold starts growing within 24 to 48 hours in wet environments.
That’s not a guess; that’s biology.
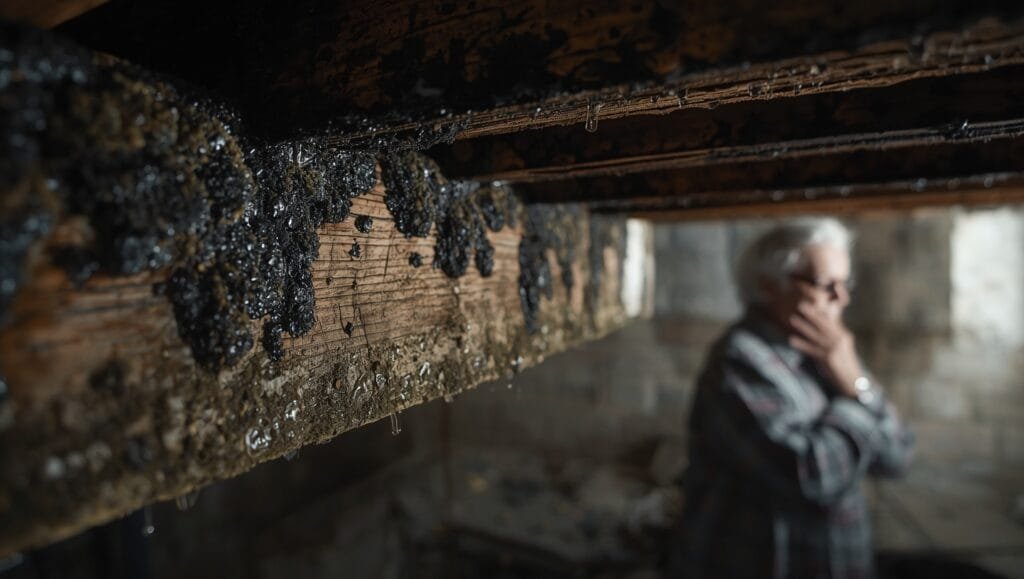
And yeah, mold’s a beast—it spreads fast and can compromise your indoor air quality, especially if you’ve got kids or anyone with respiratory issues in your house.
The structural damage compounds too.
Water weakens wood, rusts metal fasteners, and degrades drywall integrity.
A ceiling that looks stable today might sag under its own weight in a few weeks if the moisture keeps working underneath.
Then there’s the insurance angle.
Most homeowners policies cover sudden, accidental water damage—but not if you knowingly ignored a leak and let it get worse.
Waiting gives your insurance company an argument to deny your claim.
Bottom line: A ceiling leak isn’t cosmetic—it’s an active threat to your structure, air quality, and wallet.
The Most Common Causes of Ceiling Leaks
Understanding what caused your leak helps you fix it right and keep it from happening again.
Roof Damage or Age
This is the most common culprit.
Missing shingles, cracked flashing, or a roof that’s simply past its lifespan all let water in.
If your roof is older than 15–20 years, you’re living on borrowed time.
Weather accelerates the problem.
Heavy rain, ice dams in winter, and wind all exploit weak spots in roofing materials.
One bad storm can turn a slow leak into a flood.
Plumbing Issues Upstairs
If you have bathrooms or kitchens above the ceiling in question, a leaking supply line or drain could be the source.
These leaks are sneaky because they’re often slow and steady—you might not notice until significant water damage has occurred.
A burst pipe is worse.
You’ll know about it fast—usually because you’ve got water pouring down or a massive spike in your water bill.
HVAC and Condensation Problems
Air conditioning units and ductwork create condensation.
If your AC drain line is clogged or improperly installed, that water has nowhere to go but down—straight through your ceiling.
This type of leak is chronic.
It happens repeatedly, season after season, until you address the root cause.
Attic Moisture and Ventilation Failures
Poor attic ventilation traps humid air.
When warm, moist air meets a cold ceiling surface (especially in winter), condensation forms.
Over time, this moisture soaks into insulation and drywall, creating the perfect environment for mold and structural decay.
Bottom line: Identify the source first—roof, plumbing, HVAC, or ventilation—before you start repairs.
Signs Your Ceiling Leak Is Worse Than It Looks
Not all ceiling leaks are created equal.
Some need urgent attention; others are ticking time bombs.
Watch for these red flags:
- Sagging or soft spots: This means water has saturated the drywall and it’s losing structural integrity.
A collapse could happen with little warning. - Musty odors: That smell is mold growth.
It’s already established itself in spaces you can’t see. - Discoloration that spreads: If the stain is growing or new stains appear nearby, water is traveling through cavities or along structural members.
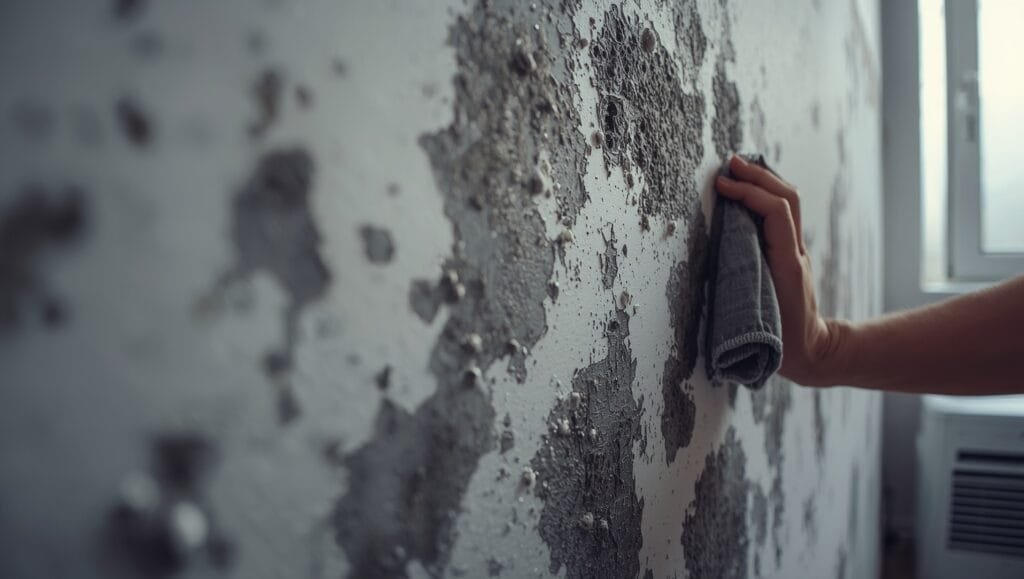
- Peeling paint or bubbling texture: The moisture is working its way through multiple layers—not just surface damage.
- Visible mold (black, green, or fuzzy growth): Stop.
This needs professional remediation.
Don’t try to clean it yourself. - Water dripping actively or pooling: This is emergency-level.
You need help today, not tomorrow.
If you spot any of these, don’t wait for the problem to “settle.”
It won’t.
It’ll get worse.
Bottom line: Sagging, mold, or active dripping means your ceiling leak has escalated—call a pro immediately.
Your First Response: The 24-Hour Window
The first day after you discover a ceiling leak is critical.
What you do—or don’t do—sets the tone for everything that follows.
Step 1: Stop the Water at the Source
If the leak is active (water dripping or flowing), find where it’s coming from.
Is there a bathroom directly above?
Check if the toilet or shower is running or if there’s visible damage to supply lines.
Is the leak near an exterior wall?
Look outside for roof damage or gutters overflowing.
If you can safely access the source and it’s a shut-off valve (like a water supply line), turn it off.
Don’t try to patch a roof leak yourself—that’s dangerous and often ineffective.
But you can move items out of the water’s path and place buckets to catch drips.
If you can’t find the source or it’s in the roof, call for help.
Speed matters here.
Step 2: Document Everything
Take photos and video of the stain, any discoloration, the surrounding area, and the extent of the damage.
Note the date and time you first noticed it.
If water is actively dripping, capture that too.
This documentation is gold for insurance claims and for helping a restoration company understand what happened.
Step 3: Protect Your Belongings
Move furniture, electronics, and valuables away from the affected area.
If water is actively dripping, place buckets or tarps underneath.
Don’t let water pool on the floor—it’ll spread the damage downward and create standing water that promotes mold growth.
Step 4: Call a Professional
This is non-negotiable.
A ceiling leak isn’t a DIY project.
You need someone who can identify the source, assess hidden damage, and coordinate repairs properly.
In Rochester, NY, JetDry has been handling emergency water situations like this for over 20 years.
Walt Latuik and his team respond 24/7—they’ve personally arrived at homes on holidays and weekends because they understand that water doesn’t wait for business hours.
When you call, have your photos ready and describe what you’re seeing.
Be specific about whether water is actively dripping, where the stain is located, and any odors you’ve noticed.
This helps the team prepare and get to you faster.
Bottom line: Stop the source, document it, protect your stuff, and call a pro within 24 hours.
Understanding Water Damage Hidden Behind Your Ceiling
Here’s the part that keeps homeowners up at night: the damage you can’t see is often worse than the damage you can.
When water seeps through your ceiling, it doesn’t just wet the drywall.
It penetrates the framing behind it.
It soaks into insulation—which, when wet, loses its R-value and becomes a breeding ground for mold.
It can travel along joists and beams, spreading moisture to areas far from the original leak point.
This is why professionals use moisture meters and thermal imaging.
They can detect water in cavities, behind walls, and in insulation long before mold becomes visible.
A standard visual inspection will miss 70% of the problem.
Consider this scenario: A homeowner in Rochester noticed a small ceiling stain in their bedroom.
They called a general contractor who patched the drywall and painted over it.
Six months later, the mold spread to the attic, the insulation was compromised, and the structural wood was starting to rot.
The cost to fix it properly? $18,000.
Could’ve been stopped at $3,000 if they’d gotten a full moisture assessment on day one.
Bottom line: Hidden moisture damage spreads fast—moisture testing catches it before mold and rot take over.
What to Expect During Professional Water Damage Assessment
When you contact a restoration company like JetDry for emergency water damage restoration, here’s what a thorough assessment looks like.
Initial Inspection and Source Identification
The team arrives and visually inspects the ceiling leak and surrounding area.
They ask questions: When did you first notice it?
Has it been raining?
Is there a bathroom above?
These details narrow down the source quickly.
They’ll also check for active water flow and assess whether the leak is ongoing or has stopped.
Moisture Detection and Mapping
Professionals use moisture meters to measure water content in drywall, insulation, and wood.
Thermal imaging cameras reveal temperature differences that indicate wet vs. dry areas—even behind walls you can’t see into.
This step is crucial because it determines how much material needs to be removed and dried.
Hidden Damage Assessment
The team checks for mold growth, structural compromise, and secondary damage.
They’ll inspect the attic (if accessible), check insulation, and evaluate wood framing for rot or swelling.
All of this gets documented in a detailed report with photos and recommendations.
Restoration Plan and Cost Estimate
Based on the assessment, you’ll get a clear plan: What needs to be removed?
What can be dried and saved?
How long will it take?
What will it cost?
No surprises, no hidden fees.
A good restoration company will walk you through this step-by-step so you understand what’s happening and why.
Bottom line: Professional assessment reveals hidden damage and creates a roadmap for proper restoration.
The Cost Reality of Waiting vs. Acting Fast
Let’s talk numbers because this is where the real pain hits.
A ceiling leak caught and repaired within 24–48 hours typically costs $2,000 to $5,000.
The fix is straightforward: identify the source, repair it, dry the affected area, replace damaged drywall, and repaint.
Wait a week?
You’re looking at $5,000 to $10,000.
Mold remediation gets involved.
More drywall and insulation need replacement.
The scope expands.
Wait three weeks or longer?
You’re in the $15,000 to $30,000 range—sometimes more if structural damage is significant.
Full attic remediation, replacement of framing, new insulation, and extensive mold treatment become necessary.
One homeowner we worked with in Rochester waited two months before calling.
By then, mold had colonized the attic, the wood framing was soft and compromised, and the insulation was unsalvageable.
The final bill: $47,000.
The original leak could’ve been stopped for under $3,000.
That’s not hyperbole.
That’s the actual cost of delay.
Your insurance might cover some of it—but only if you acted reasonably.
If the claim adjuster sees evidence that you ignored the problem, they’ll deny coverage.
Bottom line: Act within 24 hours and save thousands; wait weeks and lose tens of thousands.
Common Mistakes Homeowners Make With Ceiling Leaks
I’ve seen these patterns repeat over and over.
Mistake 1: Ignoring It or Hoping It Goes Away
A ceiling leak doesn’t resolve itself.
If anything, it gets worse.
Every time it rains, water flows back in.
Every day of moisture creates more mold and more structural damage.
Ignoring it is like ignoring a check engine light—the problem doesn’t disappear; it just gets more expensive.
Mistake 2: Only Fixing the Visible Damage
Patching the ceiling stain without addressing the source is like putting a band-aid on a bullet wound.
The water will come back.
The leak will reappear.
You’ve wasted time and money.
Always fix the root cause first.
Then address the water damage.
Mistake 3: Trying to DIY Mold Removal
If there’s visible mold, don’t try to clean it yourself with bleach and a brush.
You’ll spread spores throughout your home.
You’ll likely make it worse.
Mold remediation requires containment, proper filtration, and professional-grade treatment.
Get a specialist.
Mistake 4: Not Documenting for Insurance
Take photos immediately.
Keep receipts for any mitigation efforts you undertake.
Write down dates, times, and what you observed.
When you file a claim, this documentation is your evidence.
Without it, you’re arguing from memory, and insurance companies will exploit that.
Mistake 5: Delaying the Call to a Restoration Company
Every hour counts.
The longer water sits, the more damage occurs.
Call within 24 hours.
Don’t wait for the weekend to pass or for a “better time.”
There’s no better time than right now.
Bottom line: Fix the source, document everything, hire professionals for mold, and act fast—don’t repeat these costly mistakes.
How Professional Restoration Stops the Damage Cycle
When you bring in a professional team, the process is systematic and designed to stop further damage immediately.
Water Removal and Extraction
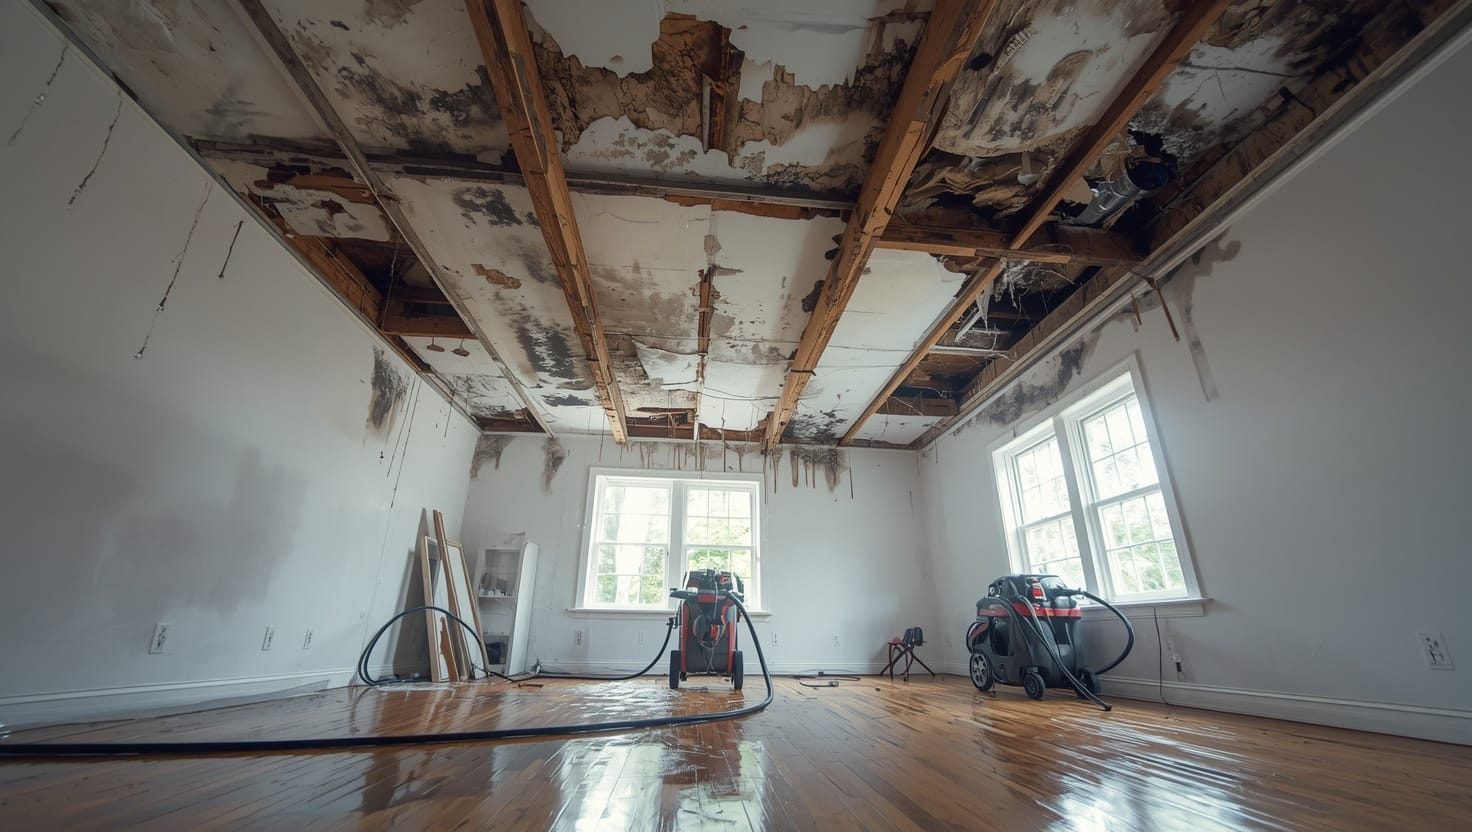
Industrial-grade pumps and extractors remove standing water and pooled moisture from cavities.
This happens first because every minute water sits is another minute it’s damaging materials.
Structural Drying
Dehumidifiers and high-velocity air movers are positioned to dry out wall cavities, framing, and insulation.
This can take days or weeks depending on the extent of saturation.
Moisture meters track progress to ensure everything is actually dry, not just surface-dry.
Mold Prevention and Treatment
If mold is present or suspected, the team applies antimicrobial treatments.
If mold has already colonized materials, those materials are removed and disposed of safely.
The area is then treated with preventative products to inhibit future growth.
Damaged Material Removal and Replacement
Drywall that’s absorbed too much water is cut out and replaced.
Insulation that can’t be saved is removed and new insulation is installed.
Framing that’s compromised is reinforced or replaced.
Restoration and Finishing
Once everything is dry and safe, the space is rebuilt.
New drywall, tape, joint compound, primer, and paint bring your ceiling back to normal.
The goal is to restore your space to pre-loss condition—or better.
Bottom line: Professional restoration removes water, prevents mold, replaces damaged materials, and rebuilds properly.
Why Speed and Expertise Matter in Ceiling Leak Recovery
You might be tempted to save money by handling parts of this yourself or waiting for a contractor who’s cheaper or “available next week.”
That’s where most homeowners go wrong.
The cost of a ceiling leak isn’t just the repair—it’s the compounding damage that occurs while you’re deciding what to do.
Every day of delay multiplies the cost.
Speed means:
- Less time for mold to establish itself.
- Less structural damage from prolonged moisture exposure.
- Less chance of secondary issues (like damage to rooms below).
- Better documentation for insurance purposes.
- Lower overall restoration costs.
Expertise means the job gets done right the first time.
No missed hidden damage.
No surprise mold problems three months later.
No repeat leaks because the source wasn’t properly addressed.
In Rochester, NY, Walt Latuik and the JetDry team combine both.
They respond within hours, not days.
They bring decades of experience and state-of-the-art equipment.
They’ve handled thousands of water damage situations—they know what to look for and how to fix it comprehensively.
Bottom line: Speed + expertise = lower costs and peace of mind.
What Your Insurance Needs to See
If you’re planning to file an insurance claim for your ceiling leak, here’s what adjusters will be looking at.
Proof of prompt action: They want to see that you acted quickly to mitigate damage.
Photos dated immediately after discovery help.
A receipt from a restoration company dated the same day as the leak is gold.
Documentation of the damage: Detailed photos showing the extent of the stain, any structural issues, and the surrounding area.
Video is even better—it shows the full scope in context.
Professional assessment: A detailed report from a restoration company outlining what was found, what was damaged, and what was done to address it.
This carries weight because it’s from a neutral third party with expertise.
Receipts and invoices: Keep everything.
Every receipt for materials, every invoice from contractors, every bill from restoration services.
This is your proof of actual costs incurred.
The source of the leak: Insurance wants to know if this was a covered event (sudden, accidental water damage from a pipe burst) or something excluded (like gradual wear and tear or neglect).
A professional assessment that identifies the source strengthens your claim.
One thing to know: most homeowners policies cover sudden water damage but not gradual leaks from poor maintenance.
If your roof was visibly damaged and you ignored it for months, your insurer might deny the claim.
But if a pipe suddenly burst or a storm caused damage, you’re covered—as long as you acted reasonably to prevent further loss.
Bottom line: Document fast, act fast, and get professional assessment—insurance favors homeowners who mitigate damage promptly.
Preventing Future Ceiling Leaks: The Long-Term Play
Once you’ve dealt with your current ceiling leak, the question becomes: how do you prevent it from happening again?
Start with your roof.
If it’s over 15 years old or showing signs of wear (missing shingles, curling edges, dark streaks), get it inspected annually.
A $300 roof inspection beats a $30,000 water damage claim.
Check your gutters and downspouts.
Clogged gutters cause water to back up and overflow, seeping under your roofline.
Clean them twice a year—more often if you have trees nearby.
Inspect plumbing regularly.
Look for soft spots under sinks, water stains on ceilings below bathrooms, or signs of slow leaks.
Catch a pinhole leak in a supply line before it becomes a burst.
Ensure your attic is properly ventilated.
Poor ventilation traps moisture and creates the conditions for mold and condensation.
If you’re not sure about your attic ventilation, get a professional opinion.
Keep your HVAC system maintained.
Clean or replace filters regularly.
Have your AC system serviced annually.
Make sure drain lines are clear and properly pitched.
Install water detection devices in high-risk areas—under sinks, near water heaters, in basements.
Some modern sensors send alerts to your phone if moisture is detected.
Early warning can save thousands.
Bottom line: Regular roof inspections, gutter cleaning, plumbing checks, and HVAC maintenance prevent most ceiling leaks.
Don’t Let a Ceiling Leak Become a Financial Disaster
Walt and his team at JetDry have saved homes like yours for over 20 years.
If you’re dealing with a ceiling leak, water damage, or mold—don’t wait.
Every hour counts.
Contact JetDry now and get help fast.
We’re available 24/7 in Rochester, NY and surrounding areas.
Your home depends on speed—and we deliver.
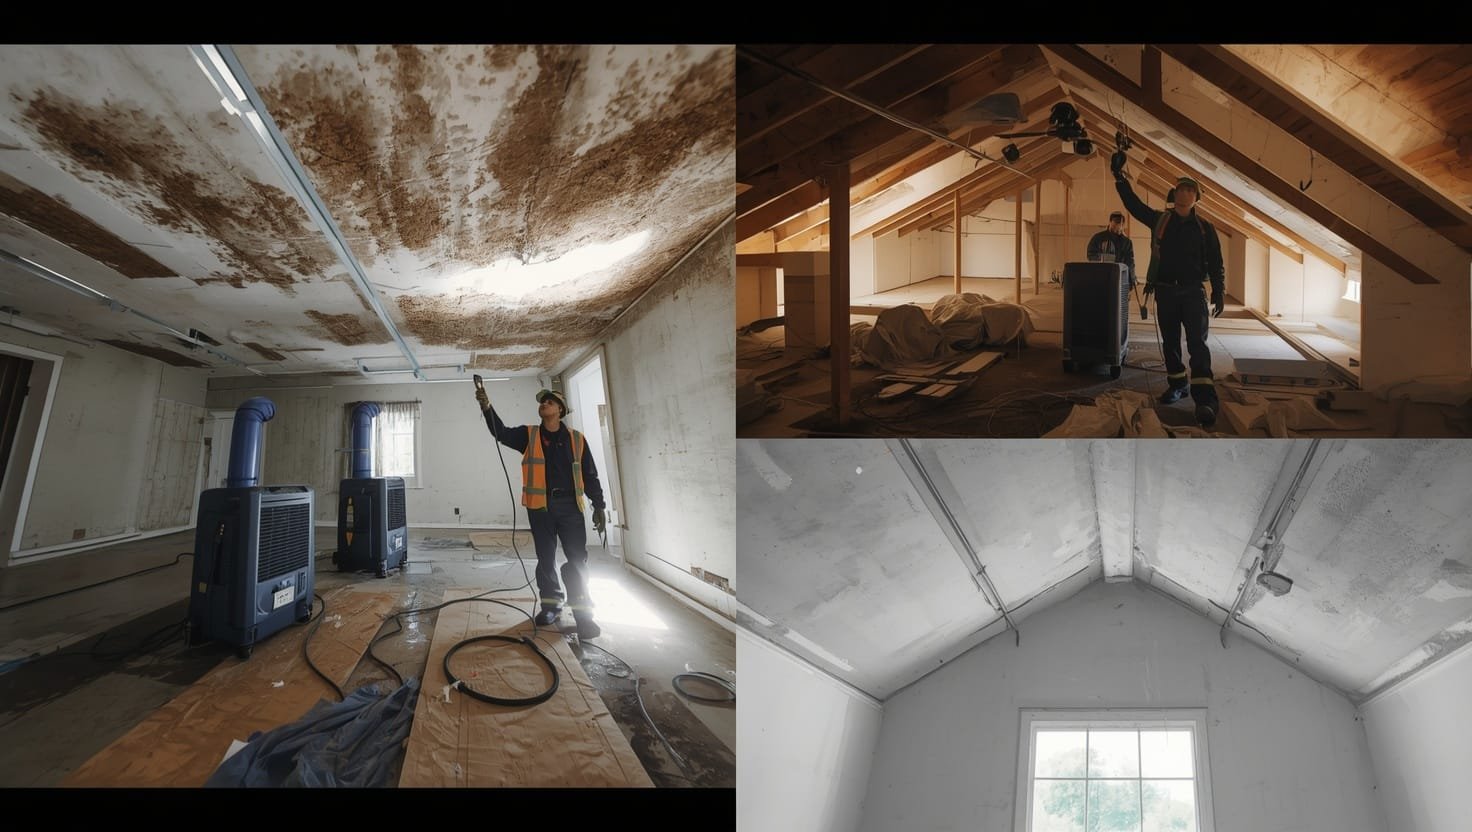
After the Leak: What Happens Next When Professionals Take Over
Your ceiling leak is real. The brown stain is spreading. You’ve called JetDry and they’re on their way. Now what?
Most homeowners have no idea what restoration actually looks like once the pros arrive. They think it’s just drying out the ceiling and painting over it. That’s not even close. What happens in the days and weeks after a ceiling leak is discovered determines whether you’ll spend $3,000 or $30,000 fixing it.
This part of the process—the professional restoration phase—is where your home either gets saved properly or gets patched up to fail again later.
The First 24 Hours: Containment and Extraction
When Walt Latuik’s team arrives at your home in Rochester, they’re not there to chat. They’re there to stop the bleeding.
The first thing they do is assess whether water is still flowing. If it is, they locate the source and stop it—whether that’s turning off a water valve, tarping a roof section, or clearing a clogged drain line. This isn’t optional. Every minute water keeps moving is another minute your home’s getting damaged.
Next comes extraction. Industrial-grade water pumps and dehumidifiers get positioned immediately. If there’s standing water in your attic, walls, or cavities, it gets pulled out fast. We’re talking commercial-level equipment—the kind that can move hundreds of gallons per hour, not the little shop vac from your garage.
Why the rush? Mold starts growing in 24 to 48 hours. Wood starts warping. Drywall loses strength. Every hour of standing water is working against you.
Bottom line: First 24 hours stops water flow and removes standing moisture—everything else depends on this.
Days 2-7: The Detection and Mapping Phase
Here’s where most DIY attempts fall apart and why calling a professional actually saves you money.
After extraction, the team brings in moisture meters and thermal imaging cameras. These tools aren’t fancy—they’re essential. They show exactly where moisture is hiding. Behind walls. In insulation. Between framing members. Everywhere your eyes can’t reach.
A homeowner in Rochester discovered a ceiling stain and thought it was just the drywall. He didn’t call anyone. Six months later, mold had spread through the entire attic cavity, the wooden joists were soft, and the insulation was colonized. He ended up paying $18,000 for what could’ve been caught and stopped at $2,500 with proper moisture mapping.
The moisture meters give exact readings. If drywall should be at 12% moisture content and it’s reading 35%, that material is getting replaced. If insulation is wet, it’s being pulled out. The team documents everything with photos and written reports—this becomes gold when you file an insurance claim.
Thermal imaging shows temperature variations that indicate wet vs. dry areas. Cold spots mean moisture is still present. The camera sees through walls, which means hidden damage gets caught before it spreads.
Bottom line: Moisture detection finds hidden damage before it becomes mold and structural failure.
The Mold Question: When It Appears and What Gets Done
Mold shows up visibly around day 3 to day 7, depending on how wet things got and how warm your home is. Black mold, green mold, white fuzzy growth—they all spell the same thing: your moisture problem has crossed into biological territory.
Here’s the thing about mold that most people don’t understand: you can’t just spray it with bleach and call it handled. That’s like spraying perfume on garbage. You’re just masking the problem.
Professional mold remediation involves containment. The team seals off the affected area with plastic sheeting to prevent spores from spreading through your home’s air. They use negative air pressure equipment—basically industrial vacuums with HEPA filtration—to pull contaminated air out of the space and filter it before it leaves.
Moldy materials get removed. Cut-out drywall. Insulation that’s colonized. Wood framing that’s soft or discolored. It all comes out. Nothing gets left behind to re-grow later.
Once materials are removed, the cavity gets treated with antimicrobial products. Not bleach. Professional-grade treatments that kill mold spores and prevent regrowth. The area gets dried completely—moisture readings have to be in the normal range before anything gets sealed back up.
Then new materials go in. New insulation. New drywall. Everything installed to code with proper vapor barriers so moisture can’t get trapped again.
Bottom line: Mold remediation requires containment, removal, treatment, and complete material replacement—not just cleaning.
Structural Assessment: The Hidden Damage Report
While drying and mold work is happening, the team is also checking your home’s structural integrity.
Water weakens wood. That’s not an opinion—it’s physics. Wood loses strength when it’s saturated. Joists that felt solid three weeks ago might be soft and spongy now. Metal fasteners rust. Drywall loses its ability to hold weight.
A thorough structural assessment means checking:
- Wood framing for soft spots, discoloration, or warping.
- Metal fasteners and brackets for rust or corrosion.
- Drywall for delamination or loss of integrity.
- Insulation for saturation and mold colonization.
- Attic components—rafters, trusses, roof decking—for moisture damage.
If framing is compromised, it either gets reinforced or replaced. You’re not cutting corners here. A ceiling that collapses because the joists were weakened by water? That’s not a $5,000 problem anymore. That’s structural failure.
Bottom line: Structural assessment catches weakened framing before it fails and causes injury or collapse.
The Drying Process: Why It Takes Longer Than You Think
Here’s where patience becomes your best friend—and where most people get frustrated.
Drying a ceiling leak properly takes time. Not because the team is slow. Because water doesn’t dry like you think it does.
Surface drying happens fast. The visible moisture evaporates in days. But moisture trapped in cavities, in insulation, in wood framing—that takes longer. You can’t see it drying, which makes it feel like nothing’s happening. But the equipment is working constantly.
Dehumidifiers pull moisture out of the air. High-velocity air movers circulate air through cavities and across surfaces. The team takes moisture readings every day, sometimes twice a day, to track progress. When readings hit the target range consistently, drying is complete.
This process can take 5 to 10 days for a small leak. Larger water damage might take 2 to 3 weeks. The team won’t sign off on restoration work until they’re confident everything is actually dry, not just surface-dry.
Why does this matter? If you start sealing walls and replacing drywall before everything’s dry, you trap moisture inside. Then mold grows behind the new materials. Then you’ve got the same problem all over again, but worse because it’s hidden.
Bottom line: Proper drying takes 1-3 weeks because moisture in cavities dries slower than surface water.
Restoration and Rebuild: Making Your Ceiling Look Normal Again
Once everything’s dry and safe, the rebuild starts.
Damaged drywall gets cut out and replaced with new material. The team uses joint compound, tape, and primers rated for moisture-prone areas. Paint goes on last—but not just any paint. Quality paint with mildew-resistant properties, especially in bathrooms or kitchens where humidity is higher.
Insulation that was removed gets replaced with new material, properly installed to code. Vapor barriers get positioned correctly so moisture doesn’t get trapped again.
The goal isn’t just to make it look like the leak never happened. The goal is to make it better than it was before—more resistant to future moisture problems.
A proper restoration means:
- New drywall, taped and finished to match surrounding ceiling.
- Fresh paint with moisture-resistant properties.
- New insulation if old material was compromised.
- Proper ventilation to prevent future condensation.
- Sealed cavities to prevent air leaks.
The whole process—from leak discovery to final paint touch-up—typically takes 2 to 4 weeks for a standard ceiling leak. Bigger jobs take longer. But at the end, your ceiling is restored and your home is protected against a repeat performance.
Bottom line: Restoration takes 2-4 weeks and replaces all damaged materials with moisture-resistant alternatives.
Insurance Coordination: Who Pays and How
Most homeowners don’t realize this, but your restoration company is going to help you navigate the insurance process. That’s part of the service.
JetDry provides detailed documentation to your insurance company. Photos of the damage. Moisture meter readings. Thermal imaging results. A written report outlining what was found, what was damaged, and what was done. This isn’t fluff—insurance adjusters use this to determine coverage and approve claims.
The team also provides an itemized estimate before work starts. That estimate gets submitted to your insurer. Most of the time, the insurer approves it. Sometimes they ask questions or request additional documentation. The restoration company handles that back-and-forth so you don’t have to.
What gets covered depends on your policy and the cause of the leak. Sudden water damage from a burst pipe? Usually covered. Gradual leak from a roof that’s been deteriorating for years? Might not be covered. The insurance company will make that determination based on the professional assessment.
Here’s the key: if you acted quickly and got a professional involved within 24 to 48 hours, your insurance company sees that as reasonable mitigation. That strengthens your claim. If you waited weeks, the adjuster might argue you let the damage get worse through negligence. That weakens your claim.
Bottom line: Professional documentation and fast response strengthen insurance claims and improve approval odds.
What to Expect on the Timeline: Week by Week
Day 1: Leak discovered. Water extraction begins. Moisture assessment starts. Source identified and stopped.
Days 2-3: Thermal imaging and moisture mapping complete. Mold assessment underway. Dehumidifiers and air movers running 24/7. Initial report provided to insurance.
Days 4-7: Mold remediation (if needed) begins. Damaged materials start getting removed. Drying equipment continues. Daily moisture readings track progress.
Days 8-14: Most drying complete. Structural repairs or reinforcement (if needed) happen. Framing and insulation replacement begins. Moisture readings approach target levels.
Days 15-21: Drying is complete. Reconstruction starts. New drywall installed. Taping, mudding, and priming happen. Paint application begins.
Days 22-28: Final touches. Paint finish coats. Cleanup. Final inspection. Warranty documentation provided.
This timeline assumes a straightforward ceiling leak with no major structural damage. Bigger jobs take longer. But this gives you a realistic picture of what the next 3 to 4 weeks look like.
Bottom line: Plan on 3-4 weeks from leak discovery to complete restoration.
Why Professional Restoration Costs What It Does
You might look at a $5,000 to $10,000 restoration bill and think it’s expensive. Then you realize the alternative—waiting and letting the damage compound—costs $20,000 to $50,000.
The cost breaks down roughly like this:
- Equipment and labor (extraction, drying): $1,500 to $3,000. Industrial equipment isn’t cheap, and running it 24/7 for a week or two adds up.
- Moisture assessment and thermal imaging: $300 to $500. Professional-grade equipment and the expertise to read it correctly.
- Mold remediation (if needed): $1,000 to $5,000. Depends on extent. Containment, removal, treatment, and prevention all add cost.
- Material removal and disposal: $500 to $2,000. Getting wet drywall, insulation, and contaminated materials out of your home safely.
- Materials (drywall, insulation, paint, tape, joint compound): $1,000 to $3,000. Quality materials that resist moisture.
- Labor for reconstruction: $2,000 to $4,000. Skilled work—taping, mudding, finishing, painting.
Add it up and you’re looking at $6,000 to $17,000 for a comprehensive restoration. That sounds like a lot until you compare it to the $30,000 to $50,000 bill a homeowner gets when they wait and let mold take over.
Speed is the best investment you can make.
Bottom line: Professional restoration costs $6k-$17k; waiting costs $30k-$50k or more.
Common Questions About the Restoration Process
How long will my home be disrupted?
Most of the active work—extraction, moisture assessment, mold remediation—happens in the first week or two. You’ll have equipment running and teams working, but it’s manageable. The rebuild phase (days 15-28) is quieter. You’re mainly dealing with drywall finishing and painting, which is less intrusive. Plan on your home being in restoration mode for 3 to 4 weeks, but it’s not a constant emergency after day 7.
Can I stay in my home during restoration?
Usually, yes. Unless there’s extensive mold remediation happening in your main living space, you can stay put. The team will set up containment barriers to keep dust and mold spores contained to the affected area. You won’t be living in a construction zone—just a home with some active restoration work happening.
What if the damage is worse than expected once they open the walls?
This happens. The team opens up a wall expecting moderate water damage and finds extensive mold or structural compromise. That’s why you hire professionals—they know how to handle surprises. They’ll document what they find, update the scope of work, and get insurance approval for the additional costs before proceeding. You won’t get hit with surprise bills.
Do I need to do anything during the drying process?
Nope. Keep windows closed so the equipment works efficiently. Don’t move the dehumidifiers or air movers. Don’t try to open up walls or remove materials yourself. Let the team do their job. The less interference, the faster and more effective the drying process.
What warranty do I get after restoration?
Reputable restoration companies stand behind their work. JetDry provides a warranty on materials and workmanship. That means if something fails within the warranty period, they fix it at no cost. Read the warranty carefully—most cover materials for 1 to 5 years and workmanship for 1 year.
Bottom line: Professional warranties protect you if something goes wrong after restoration is complete.
The Real Cost of Not Acting Fast
Let me give you the actual numbers from a homeowner in Rochester who ignored a ceiling leak for two months.
When they finally called, the damage was:
- Mold colonizing the entire attic cavity.
- Wood framing soft and compromised—joists needed reinforcement.
- Insulation completely saturated and unsalvageable.
- Drywall in the bedroom and hallway delaminated.
- Secondary damage to the room below from water seeping through.
The final restoration bill: $47,000.
The original leak? Could’ve been stopped for $2,500 if they’d called within 24 hours.
That’s not an outlier. That’s the math of delay.
Bottom line: Two months of waiting cost $44,500 more than catching it fast.
Getting Started: What to Do Right Now
If you’ve got a ceiling leak, here’s your next move:
Call JetDry for emergency water damage restoration in Rochester, NY right now. Don’t wait for Monday. Don’t wait for tomorrow. Walt Latuik and his team respond 24/7 to water emergencies. They’ll ask you questions about the leak—where is it, is water actively dripping, have you noticed any smells—and they’ll arrive within hours with equipment and expertise.
Have your photos ready. Describe what you’re seeing. Be honest about how long it’s been since you noticed the leak. The more information you give them, the faster they can respond and assess the damage.
Once they arrive, your job is simple: get out of their way and let them work. They’ll handle the extraction, assessment, documentation, insurance coordination, and restoration. You’ll just watch your home get saved.
The cost of that call? Free. The assessment? Free. The peace of mind knowing your ceiling leak is being handled properly? Priceless.
The alternative—ignoring it and hoping it goes away—costs thousands.
Bottom line: Call a pro within 24 hours and save thousands in compounding damage.
Your Ceiling Leak Doesn’t Wait—Neither Should You
Walt Latuik and the JetDry team have been handling water damage emergencies in Rochester, NY for over 20 years. They’ve seen ceiling leaks spiral into $50,000+ restoration jobs because homeowners waited. Don’t be that person. Contact JetDry now and get a professional on-site within hours. Available 24/7 for emergency water damage restoration in Rochester and surrounding areas. Your home depends on speed—and we deliver.
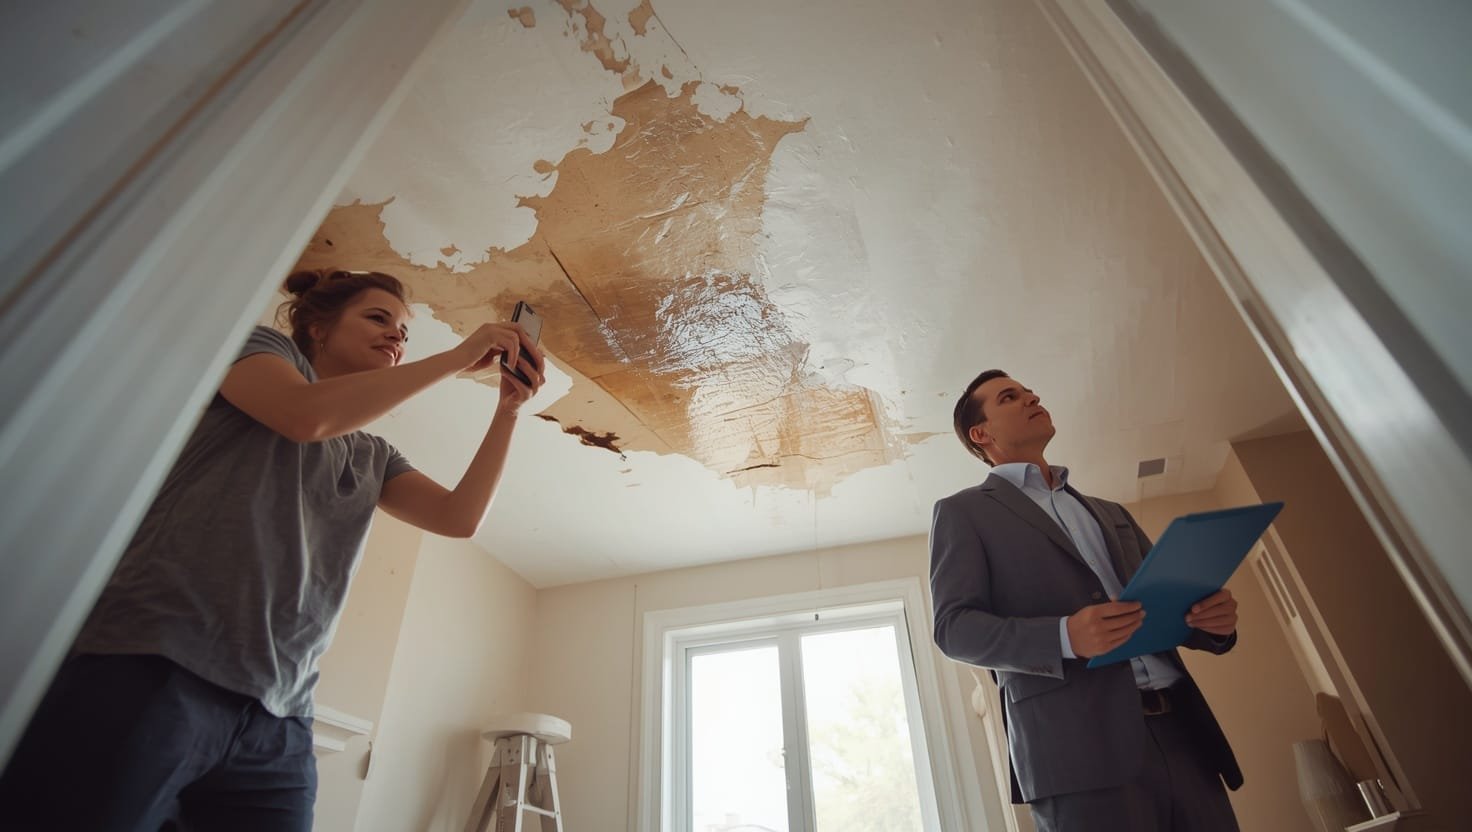
The Ceiling Leak Aftermath: Why Your Insurance Claim Gets Denied (And How to Fix It)
You’ve got the water dried up, the mold remediated, and the ceiling rebuilt. Everything looks good. Then your insurance company sends a letter: “Claim denied.”
This happens more than you’d think. Not because the damage wasn’t real. But because homeowners make mistakes during the claims process that give insurers the ammunition to walk away.
The good news? Most of these mistakes are avoidable. You just need to know what you’re up against.
Why Insurance Companies Deny Ceiling Leak Claims
Insurance isn’t your friend. It’s a business. And businesses deny claims when they can legally justify it.
The most common reason for denial on a ceiling leak claim comes down to negligence. Your insurer will argue that you knew about the problem and didn’t act fast enough. A slow leak that went ignored for weeks? That’s grounds for denial. A sudden burst pipe that you addressed immediately? That’s covered.
The timeline matters. A lot.
If you discovered a ceiling stain on Monday and didn’t call a restoration company until Friday, the insurer can claim you weren’t diligent in mitigating damage. They’ll say you let the problem get worse through inaction. And they’re not entirely wrong—every day of delay compounds the damage.
Another reason claims get denied: lack of documentation. You need photos from day one. You need receipts. You need a professional assessment that shows you acted reasonably. If you can’t prove you did something about it quickly, the insurer will use that against you.
Bottom line: Act fast and document everything—insurers deny claims based on negligence and lack of evidence.
The Documentation Problem Most Homeowners Don’t See Coming
Here’s the scenario: You notice a ceiling stain. You call a contractor. He comes out, looks at it, and says “Yeah, that’s water damage.” Then he writes up an estimate and starts work.
Sounds reasonable, right?
Wrong. Your insurer needs way more than that.
They need initial photos with timestamps showing the extent of damage when you first discovered it. They need a detailed professional assessment—not just a contractor’s estimate, but an actual water damage evaluation report. That report should include moisture meter readings, thermal imaging results, and documentation of hidden damage.
Most general contractors won’t provide that level of detail. They’ll just patch the ceiling and move on. Then when you file a claim, you’ve got nothing to show the insurance company except “a guy fixed it.”
A homeowner in Rochester discovered a leak in her master bedroom. She hired a local handyman who patched the drywall and painted over it. Six months later, mold appeared in the attic. She tried to file an insurance claim for the mold remediation, but the insurer denied it. Why? Because she had no documentation of the original water damage, no moisture readings, and no professional assessment showing that the initial leak caused the mold growth.
She ended up paying $12,000 out of pocket for mold remediation that might’ve been covered if she’d gotten a proper assessment from day one.
Bottom line: Professional assessments with photos and moisture data are non-negotiable for insurance claims.
The Causation Trap: Proving Your Leak Caused the Damage
Here’s where things get tricky. Your insurer doesn’t just care that you have water damage. They want to know if the damage is their responsibility or yours.
A ceiling leak from a burst pipe? That’s sudden and accidental—usually covered. A ceiling leak from a roof that’s been deteriorating for five years? That’s gradual wear and tear—usually not covered.
The insurer will investigate the source of your leak. If they determine it was caused by poor maintenance or a known condition you ignored, they’ll deny the claim.
This is where a professional assessment saves you. A restoration company like JetDry will identify the exact source of the leak. Was it a sudden pipe burst? A storm-caused roof failure? A clogged HVAC drain? The source matters because it determines coverage.
If you can prove the leak was caused by a sudden, accidental event—not by negligence on your part—the insurer’s much more likely to approve the claim.
One homeowner got lucky. A pipe burst in his attic, causing significant water damage. He called JetDry immediately. The team documented the burst pipe with photos, identified it as the source, and provided that documentation to the insurance company. Claim approved. Full coverage. No arguments.
Bottom line: Professional source identification strengthens claims by proving sudden vs. gradual damage.
The Mitigation Window: Why 24 Hours Matters for Your Claim
Insurance companies have a concept called “duty to mitigate.” Basically, once you know about damage, you’re required to take reasonable steps to prevent it from getting worse.
That means calling a restoration company within 24 hours isn’t just good for your home—it’s good for your claim.
If you discover a ceiling leak on Monday and don’t call anyone until the following Wednesday, the insurer can argue you violated your duty to mitigate. They’ll say you let preventable damage occur through inaction.
But if you call within 24 hours, you’ve got a paper trail showing you acted responsibly. The restoration company’s receipt is dated the same day as the leak. Photos are timestamped immediately. The insurer can’t claim negligence.
This 24-hour window is your shield against claim denial.
Walt Latuik and his team at JetDry understand this. When homeowners call with a ceiling leak, they arrive fast—often within hours. That speed becomes evidence of your diligence. The insurer sees the dated receipt and knows you took action immediately.
Bottom line: Calling a pro within 24 hours proves you met your duty to mitigate damage.
The Hidden Damage Disclosure: What You Must Tell Your Insurer
When you file a claim for a ceiling leak, you have to be honest about what you’ve discovered. That includes damage you can’t see.
If a professional assessment reveals mold in your attic or compromised framing, you need to disclose that. If moisture readings show saturation in cavities behind walls, that gets disclosed too.
Some homeowners try to hide the scope of damage, thinking it’ll keep their claim simple. Big mistake. If the insurer finds out you knew about hidden damage and didn’t disclose it, they’ll deny the entire claim—not just the hidden damage part.
Transparency is your best defense. Tell your insurer everything. Let them decide what’s covered and what isn’t. At least you’re protected from fraud accusations.
Bottom line: Disclose all damage—hidden or visible—to avoid claim denial for fraud.
The Contractor Selection Problem: Why Your Insurer Cares Who You Hire
Here’s something most homeowners don’t know: your insurer might have preferred contractors or specific requirements for how repairs get done.
Some policies require you to get multiple estimates. Some require the use of preferred vendors. Some have specific standards for how water damage restoration must be conducted.
If you hire a contractor who doesn’t meet those requirements—or if you don’t follow the insurer’s process—they can deny your claim or reduce your payout.
That’s why it’s smart to call your insurance company before starting any major restoration work. Tell them what happened, ask about their requirements, and ask if they have preferred contractors.
Then, when you hire someone like JetDry for emergency water damage restoration, you’ve got the insurer’s blessing. No surprises. No claim denials because you didn’t follow their process.
Bottom line: Check with your insurer about contractor requirements before hiring restoration services.
The Deductible Reality: What You’re Actually Paying
Even if your claim gets approved, you’re not getting the full bill covered. Your deductible comes out of your pocket first.
Most homeowners have a deductible between $500 and $2,500. Some have higher deductibles if they’ve chosen that option to lower their premiums.
Here’s the math: If your ceiling leak restoration costs $8,000 and your deductible is $1,000, you pay $1,000 and the insurer pays $7,000. If your restoration costs $3,000 and your deductible is $1,000, you pay the full $3,000 because it’s below your deductible.
This is why acting fast matters. A leak caught immediately might cost $3,000 to fix. You pay the deductible, insurance covers the rest. A leak ignored for weeks might cost $15,000 to fix. You pay the deductible, insurance covers the rest—but the damage is way worse.
Speed doesn’t just save you money. It makes your claim more manageable.
Bottom line: Your deductible applies regardless of damage size—act fast to minimize total costs.
The Exclusion Clause Surprise: What Your Policy Actually Covers
Read your homeowners policy. Seriously. Most people don’t, and that’s where the surprises come from.
Some policies exclude certain types of water damage. Flood damage is almost always excluded (you need separate flood insurance). Damage from poor maintenance is often excluded. Damage from known defects you didn’t fix is excluded.
If your ceiling leaked because your roof was visibly deteriorating and you ignored it for a year, that’s excluded. If your ceiling leaked because a pipe was already showing signs of wear and you didn’t replace it, that’s excluded.
But if your ceiling leaked from a sudden burst pipe or a storm-caused roof failure, that’s usually covered.
The key is knowing what your policy says before you need to file a claim. If you’re unsure, call your insurance agent and ask specifically about water damage from ceiling leaks. Get it in writing if possible.
Bottom line: Check your policy for exclusions—water damage coverage varies wildly between insurers.
The Timeline Trap: When Claims Get Denied for Filing Late
You’ve got a deadline to file your claim. Most policies require you to notify your insurer within a specific timeframe—usually 30 to 90 days from the date of loss.
If you wait too long to file, the insurer can deny your claim outright. They don’t have to pay if you didn’t notify them in time.
This is especially true if you discover damage months after it happened. Say you find a ceiling stain in March but don’t file a claim until June. The insurer might argue that you waited too long, that the damage could’ve been worse because you didn’t act, or that they can’t determine causation after so much time has passed.
The safest move is to file your claim as soon as you discover damage. Don’t wait for estimates. Don’t wait for the restoration to be complete. File immediately, provide initial documentation, and then keep the insurer updated as the restoration progresses.
Bottom line: File your insurance claim within 30 days of discovering damage—don’t wait.
The Professional Assessment Advantage: Why JetDry’s Reports Matter
When JetDry conducts a water damage assessment, they’re not just figuring out how to fix your home. They’re creating a legal document that supports your insurance claim.
Their reports include:
- Detailed photos with timestamps showing the extent of damage.
- Moisture meter readings proving water saturation.
- Thermal imaging showing hidden moisture in cavities and walls.
- Identification of the leak source and cause.
- Documentation of mold growth or risk.
- Structural assessment noting compromised materials.
- Itemized estimate for all restoration work.
Insurance adjusters respect professional reports. They’re written by experts, they include objective measurements, and they’re documented thoroughly. When you submit that report to your insurer, you’re giving them everything they need to approve your claim.
Compare that to a handyman’s estimate that just says “Fix ceiling—$2,500.” No wonder claims get denied. There’s no evidence. No documentation. No proof of actual damage.
Bottom line: Professional assessments with data and photos are your strongest claim evidence.
What to Do Right Now if You Have a Ceiling Leak
You’re reading this because you’ve either got a ceiling leak or you’re worried about one. Here’s your action plan:
Step 1: Call JetDry for emergency water damage restoration immediately. Don’t wait. They’ll arrive fast and start mitigation.
Step 2: Take photos and video of the damage. Timestamp everything. Document the date and time you discovered it.
Step 3: Call your insurance company. Tell them what happened and that you’ve contacted a restoration company. Ask about their requirements and preferred contractors.
Step 4: Keep all receipts and documentation. Every invoice, every estimate, every photo. This becomes your claim evidence.
Step 5: File your claim within 30 days. Include the professional assessment from the restoration company.
That’s it. You’ve done everything right. Your claim will likely get approved.
Bottom line: Act fast, document thoroughly, hire professionals, and notify your insurer promptly.
FAQ: Insurance and Ceiling Leaks
Does homeowners insurance cover ceiling leaks from pipes?
Yes, if the leak is sudden and accidental (like a burst pipe). Gradual leaks from deteriorating pipes or poor maintenance are usually excluded. Your policy details matter—check with your insurer.
Does insurance cover ceiling leaks from roof damage?
It depends on the cause. A sudden storm that tears off shingles? Usually covered. A roof that’s been deteriorating for years and you ignored it? Probably not covered. The insurer will investigate.
How long do I have to file a ceiling leak claim?
Most policies require notification within 30 to 90 days of discovering the damage. Some give you longer to file the actual claim, but it’s best to notify your insurer immediately. Check your policy for specifics.
What if my insurance denies my ceiling leak claim?
You have the right to appeal. Submit additional documentation, get a second professional assessment if needed, and challenge the denial in writing. Many denials get overturned on appeal, especially if you have strong evidence.
Will my rates go up after a ceiling leak claim?
Possibly. Most insurers increase rates after a water damage claim, especially if you file multiple claims. The increase varies by insurer and your claims history. It’s worth asking your agent before filing.
Can I hire any contractor for restoration, or does my insurer have requirements?
Some insurers have preferred contractors or specific requirements. Always check with your insurance company before hiring someone. They might require multiple estimates, specific licensing, or adherence to certain standards.
Your Ceiling Leak Claim Doesn’t Have to Get Denied
Walt and his team at JetDry have helped hundreds of Rochester homeowners navigate insurance claims after water damage. They provide the detailed professional assessments that insurers actually respect. If you’ve got a ceiling leak, don’t gamble with your claim. Contact JetDry now and get help that’s fully documented for your insurance company. Available 24/7 in Rochester, NY and surrounding areas. We’ll handle the restoration and give you the evidence your insurer needs to approve your claim.