How To Dry Out Water Under Tiles Fast
- Wolfe McNeel
Water Under Your Tiles Could Cost You $10,000+ in Just 48 Hours—Here’s How to Dry It Out Before It’s Too Late
Water trapped beneath tile is a silent killer.
You don’t see it at first. The tile looks fine. The grout seems solid. But underneath? Moisture is pooling, spreading, and eating away at the substrate like a slow-motion disaster.
Mold colonies can take over in less than 48 hours when there’s standing water under tiles. Structural damage follows. Your subfloor rots. Wood frames weaken. And suddenly you’re looking at a $10,000 to $25,000 repair bill—or worse.
The good news? You can stop this right now.
Learning how to dry out water under tiles is one of the smartest moves you can make as a homeowner. Not because you want to DIY a full restoration (that’s a job for pros), but because knowing the right steps means the difference between saving your floor and losing it entirely.
Here’s what you need to know.
Why Water Under Tiles Is So Dangerous
Most people think water damage is obvious. You see a puddle, you mop it up, you’re done.
Water under tiles doesn’t work that way.
Tile is impermeable—that’s the whole point. It keeps water out. But when water gets underneath (through cracked grout, a leaking pipe, a bathroom overflow, or a foundation crack), it gets trapped. It can’t evaporate naturally. It sits there, pooling against wood, concrete, or whatever’s holding that tile up.
This is where the damage accelerates:
- Wood substrates rot — If your tiles are installed over wooden joists or plywood, water turns that material into mush within weeks.
- Concrete deteriorates — Concrete looks solid, but water seeping into tiny pores causes it to expand and crack. Freeze-thaw cycles make it worse.
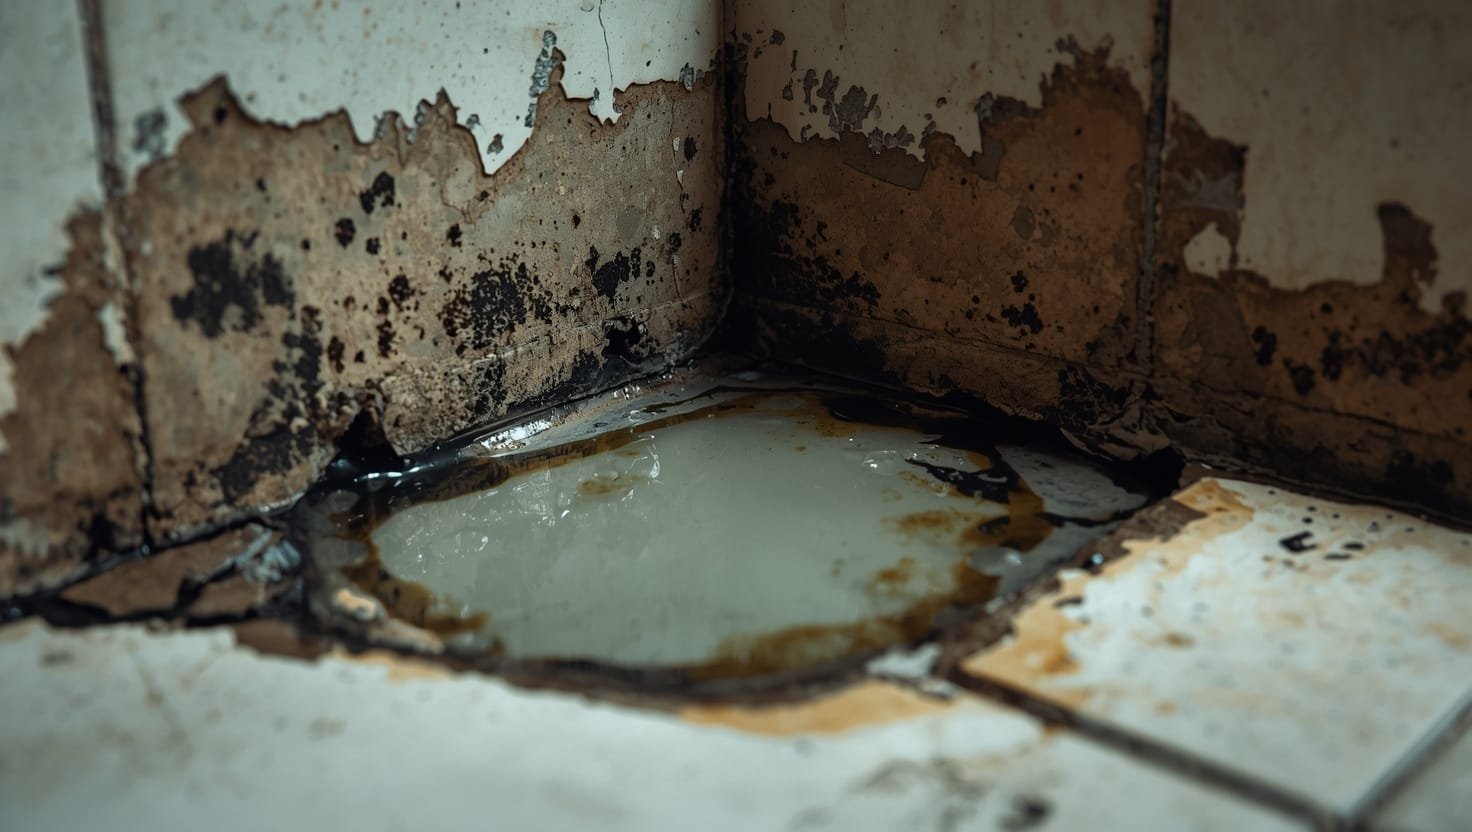
- Mold grows fast — Mold loves moisture and darkness. Under tiles, it’s the perfect environment. You won’t see it until it’s everywhere.
- The smell gets worse — Stagnant water under tiles smells like decay because that’s exactly what’s happening.
- Structural integrity fails — Floors start to sag. Tiles crack or pop. Walking on them becomes unsafe.
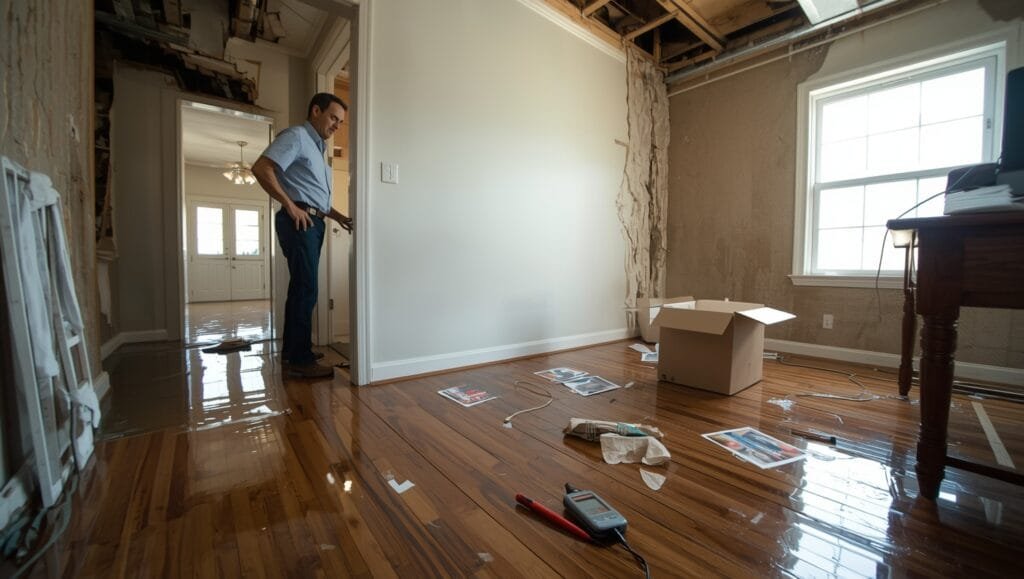
One homeowner in Rochester discovered water under her bathroom tiles after a pipe burst behind the wall. She waited three days thinking it would dry on its own. By the time she called JetDry, mold had already colonized the subfloor, and the entire bathroom needed a rebuild—$18,000 in repairs that could’ve been contained if caught early.
Bottom line: Water under tiles spreads fast and hides until it’s catastrophic—time is your enemy.
How Water Gets Under Tiles in the First Place
Understanding the source is half the battle.
Water doesn’t randomly appear under your tiles. It gets there through specific pathways. Identify the source, and you know what you’re dealing with.
Cracked or Failing Grout
Grout is porous. It absorbs water. If your grout is cracked, missing, or wasn’t sealed properly, water seeps right through it and pools underneath.
This is especially common in bathrooms and kitchens where moisture is constant.
Leaking Pipes
A slow leak in a water line under your tile floor can go unnoticed for months. You’ll notice soft spots, discoloration, or a musty smell before you see the actual leak.
Flooding or Overflow
Burst pipes, overflowing toilets, failed water heaters—these dump water fast and it finds its way under tiles in seconds.
Foundation Cracks or Poor Drainage
If your home sits on a concrete slab and the foundation cracks, groundwater creeps under your tiles. Same thing happens if gutters aren’t working or grading slopes toward your house instead of away from it.
Improper Installation
Tiles installed without a proper waterproofing membrane or vapor barrier underneath are basically asking for trouble. Water finds its way in, and there’s nothing stopping it from pooling below.
Bottom line: Find the source first—it tells you whether you’re dealing with a quick fix or a bigger problem.
The First 24 Hours: Your Critical Window
The first day after you discover water under tiles is make-or-break time.
What you do in the next 24 hours determines whether you’re looking at a $2,000 fix or a $20,000 nightmare.
Step 1: Stop the Water Source Immediately
Before you even think about drying anything out, shut off the water.
If it’s a burst pipe, locate your main water shutoff and turn it off. If it’s an overflow, stop it at the source (fix the toilet, turn off the water heater, etc.). If it’s groundwater, that’s more complex—you might need a sump pump or French drain, but that’s a longer-term fix.
Don’t dry out wet tiles while water is still getting under them. You’re just moving the problem around.
Step 2: Remove Standing Water
Use a wet vacuum (a Shop-Vac or similar) to pull out any standing water you can access. If water is trapped directly under tiles, you won’t reach all of it this way, but you’ll get what’s on the surface.
If there’s significant pooling, a dehumidifier and fans won’t cut it alone—you need to extract the water mechanically.
Step 3: Increase Air Circulation
Open windows and doors (assuming it’s not raining). Get fans moving air across the tile surface. Don’t just point a box fan at the tiles—you want air flowing through the room to help evaporation.
This is where a high-velocity air mover (also called a floor dryer) becomes valuable. These aren’t cheap to rent, but they move air at high speed across the tile surface and help push moisture out from underneath.
Step 4: Bring in Dehumidification
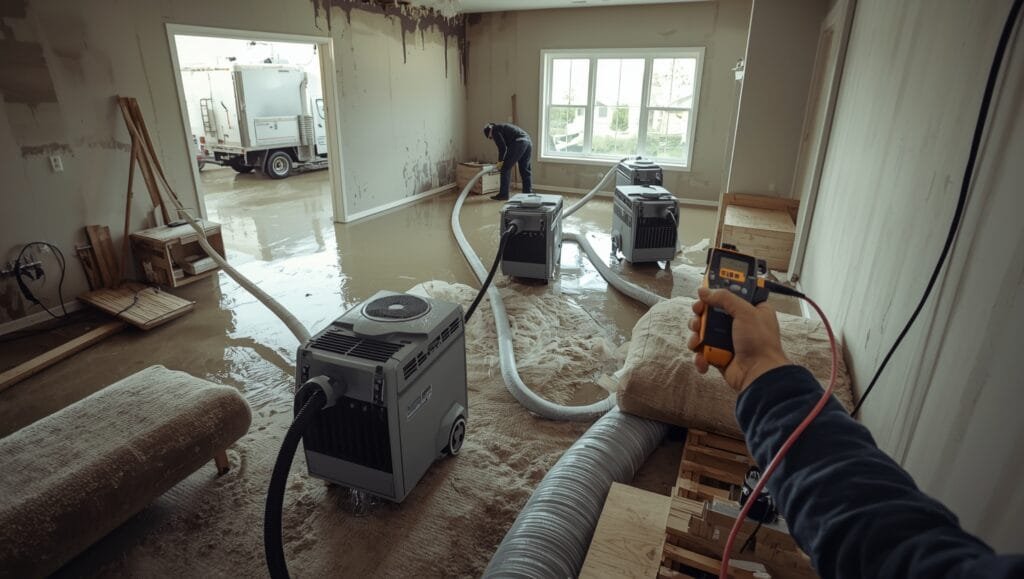
A standard household dehumidifier won’t cut it for serious water under tiles. You need an industrial-grade dehumidifier that can pull moisture from the air and the porous materials around the tiles.
These pull gallons of water out of the air daily—way more effective than letting a room naturally dry.
Bottom line: Stop the source, extract standing water, then dehumidify hard—you’ve got one day to prevent mold.
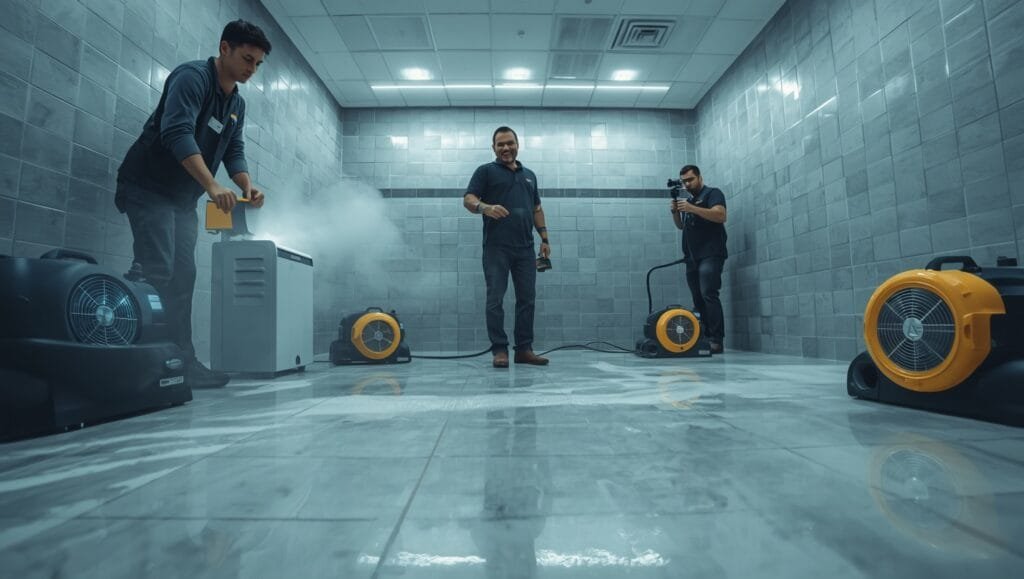
When DIY Stops and Professional Help Starts
Here’s the honest truth: if you’re past the first 24 hours or if water is trapped under tiles in a large area, you’re not drying this out with fans and dehumidifiers alone.
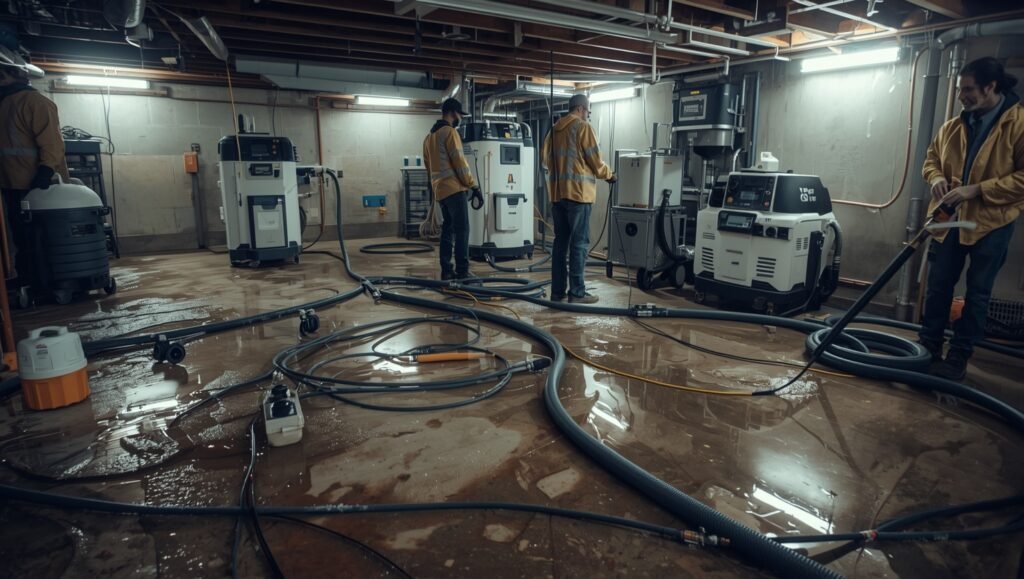
Professional water restoration teams have tools you don’t have access to.
They use moisture meters to detect water behind walls and under surfaces you can’t see. They deploy industrial dehumidifiers, air movers, and sometimes they’ll cut into the tiles or subfloor to reach trapped moisture.
This sounds extreme, but it’s the difference between stopping mold at day 3 and discovering black mold in your walls at day 30.
One homeowner near Rochester tried to handle water under his kitchen tiles himself. He rented a dehumidifier from a big-box store, opened windows, and waited. Two weeks later, he noticed a soft spot in the floor. The subfloor had started to rot. He ended up calling JetDry for emergency water damage restoration, and they had to remove the entire floor to dry out the substrate underneath. Total cost: $14,000 instead of the $3,000 it would’ve been if he’d called them on day one.
Professional teams also know how to handle mold after water damage—because it’s coming. You can’t prevent it if water sits for days. Pros can stop it before it spreads.
Bottom line: DIY works for the first 24 hours; after that, call a pro or you’re gambling with your home.
The Role of Moisture Barriers and Waterproofing
This is the part that could’ve prevented the whole mess.
If your tiles were installed with a proper waterproofing membrane underneath—especially in bathrooms and kitchens—water wouldn’t pool under them in the first place.
A quality vapor barrier or waterproofing membrane sits between your subfloor and the tile. It redirects water to drainage points instead of letting it pool.
Common waterproofing methods include:
- Sheet membranes — Rubber or plastic sheets that seal the entire surface.
- Liquid membranes — Painted on like a coating, they create a waterproof layer.
- Tile backer board — Special boards designed to resist water (though they’re not foolproof).
- Grout sealers — Applied to grout lines to prevent water penetration.
If your tiles don’t have these, and water gets under them, you’re in for a rough time.
After you’ve dried out your current water problem, talk to a contractor about tile and grout services that include proper waterproofing. It’s an investment now that saves you tens of thousands later.
Bottom line: Prevention through proper waterproofing beats emergency drying every single time.
Tools You’ll Need (And When to Rent Them)
If you’re tackling how to dry out water under tiles in the first 24-48 hours, here’s what actually works:
Wet Vacuum
Cost: $50-150 to buy, $20-30 per day to rent.
What it does: Pulls standing water off the surface and out of grout lines.
When you need it: Immediately, within the first few hours.
Industrial Dehumidifier
Cost: $50-100 per day to rent.
What it does: Pulls moisture from the air and materials. A good one removes 10-20 gallons of water per day.
When you need it: Start this as soon as possible and run it continuously for 48-72 hours minimum.
Air Movers (Floor Dryers)
Cost: $15-25 per day to rent, often cheaper if you rent multiple.
What it does: Pushes air across the tile surface at high speed, accelerating evaporation.
When you need it: Run these 24/7 alongside the dehumidifier.
Moisture Meter
Cost: $30-100 to buy, $10-15 per day to rent.
What it does: Tells you if moisture is still trapped under the tiles. This is how you know if you’re actually making progress.
When you need it: Check daily. If readings aren’t dropping, you need professional help.
Thermal Imaging Camera
Cost: $200+ to buy, $50-75 per day to rent.
What it does: Shows you exactly where moisture is hiding. Pros use these to map out the wet zones.
When you need it: If water is under a large area or you can’t locate it visually.
Renting this stuff adds up fast. A dehumidifier, two air movers, and a wet vacuum for 3 days can run $250-400. That’s why many people call professionals immediately—the cost difference is smaller than you’d think, and pros get it right the first time.
Bottom line: Rentals are cheap upfront but add up fast; weigh that against professional restoration costs.
Why Mold Forms Under Tiles (And How to Prevent It)
Here’s what happens after water sits under tiles for 48 hours:
Mold spores are literally everywhere—in the air, in the dust, on surfaces. They’re waiting for one thing: moisture plus darkness. Under your tiles? That’s mold paradise.
Mold starts growing at 48 hours. By day 5, it’s established. By day 10, it’s spreading through the subfloor and into adjacent areas.
You won’t see it because it’s under the tiles. You’ll smell it—a musty, earthy odor that gets stronger over time. Eventually, you’ll see discoloration on the tiles themselves or notice soft spots in the floor.
By then, the mold has already colonized the subfloor and possibly the framing underneath.
Prevention comes down to speed: the faster you dry it out, the less time mold has to establish itself.
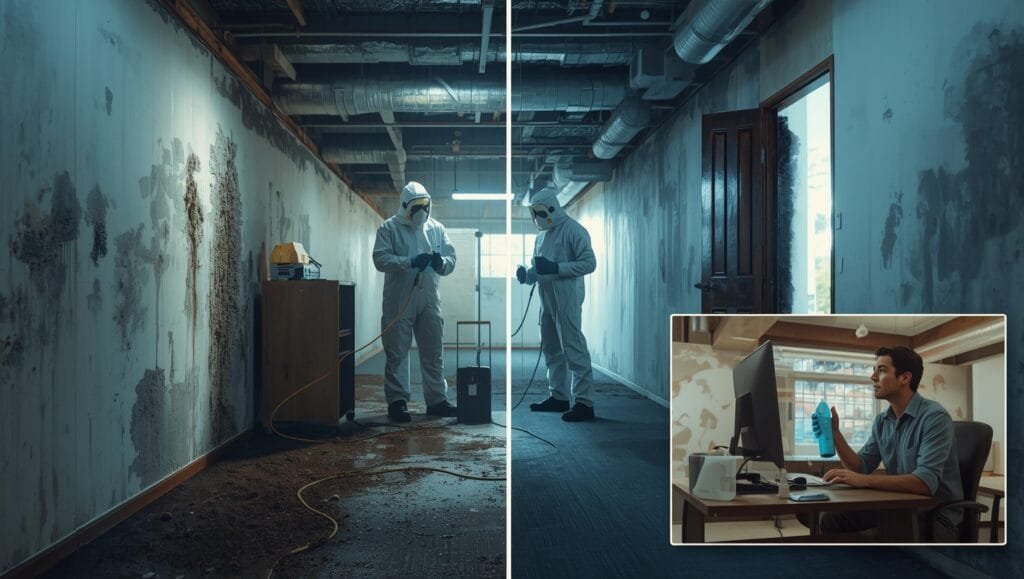
If you’re already past the 48-hour window, mold remediation services become critical. Pros can identify mold growth, remove contaminated materials, and treat the area to stop future growth.
Don’t ignore the smell or soft spots. That’s your signal that mold is already growing—and it’s time to call in professionals.
Bottom line: Mold wins in 48 hours; dry faster than mold grows or you’ll need remediation.
Real Costs: What Water Under Tiles Actually Costs You
Let’s talk money because that’s what motivates action.
A typical scenario: water gets under bathroom tiles on day 1. You notice it on day 2. You rent equipment and try to dry it out yourself.
Scenario A: You catch it early and act fast
- Dehumidifier rental (3 days): $150
- Air movers (3 days): $75
- Wet vacuum rental: $30
- Your time and stress: priceless
- Total: $255
Scenario B: You wait a week, then call a pro
- Professional water extraction and drying: $1,200-2,000
- Mold testing and remediation: $800-1,500
- Subfloor replacement (if rotted): $1,500-3,000
- Total: $3,500-6,500
Scenario C: You ignore it for a month
- Full floor removal and replacement: $5,000-8,000
- Structural repairs (rotted joists, etc.): $3,000-7,000
- Mold remediation: $1,500-3,000
- Possible HVAC contamination: $500-2,000
- Total: $10,000-20,000+
Speed saves money. Every single time.
Bottom line: Act within 24 hours and save $10,000+ compared to waiting a week.
The Professional Advantage: Why Pros Dry Out Water Under Tiles Better
Professional restoration companies don’t just throw fans and dehumidifiers at the problem.
Here’s what they actually do:
1. Moisture Detection and Mapping
They use moisture meters and thermal imaging to locate exactly where water is hiding. You’re guessing. They know.
2. Strategic Dehumidification
They position industrial dehumidifiers based on moisture readings, not hope. They also manage humidity levels across the entire space, not just the wet spot.
3. Access When Needed
Sometimes the only way to truly dry out water under tiles is to remove some tiles temporarily, dry the substrate underneath, then reinstall them. Pros know when this is necessary and can do it without destroying your floor.
4. Mold Prevention Protocol
If there’s any sign of mold risk, they’ll apply antimicrobial treatments to prevent growth while drying is happening.
5. Documentation for Insurance
Professionals document everything—moisture readings, equipment used, timeline, photos. This helps when you file an insurance claim.
6. Speed and Efficiency
They work around the clock if needed. What takes you a week takes them 2-3 days.
Walt Latuik and his team at JetDry have been handling water damage in Rochester for over 20 years. They’ve seen every variation of water under tiles—from slow leaks to catastrophic floods. They know exactly how to dry out water under tiles fast because they do it every week.
Bottom line: Pros have tools, knowledge, and speed; DIY gets you through the first 24 hours only.
The Hidden Timeline: What Happens Hour by Hour When Water Sits Under Tiles
You’ve got water under your tiles right now.
You don’t know it yet, but damage is happening on a clock.
Not days—hours.
The first 6 hours feel fine. The tiles still look normal. You might not even realize there’s water trapped underneath.
But your subfloor is already absorbing moisture like a sponge.
By hour 12, wood starts to swell. Concrete begins to absorb water into its pores. The environment shifts—dark, wet, airless. Perfect conditions are forming.
Hour 24 hits and mold spores are already germinating. They’re invisible, but they’re there.
Hour 48? Mold colonies are established. You might smell something off by now—that earthy, musty odor that gets worse by the day.
This is why knowing the timeline matters. It’s not about panic. It’s about understanding that every hour you wait costs you money and structural integrity.
Hours 0–6: The Silent Start
Nothing looks wrong yet.
The water’s under the tiles, so you can’t see it. Your grout might look fine. The tile surface is dry to the touch. Walk across your floor and it feels normal.
But underneath, water’s pooling against your subfloor. If it’s wood—plywood, OSB, or joists—it’s already starting to absorb moisture. Wood fibers swell when wet. That swelling creates stress on the tile adhesive.
If you’re on concrete, the water’s seeping into microscopic pores. Concrete’s not solid—it’s full of tiny channels. Water travels through them like highways.
The air under the tiles is still relatively dry at this point. This is your window. If you catch it now and start drying immediately, you can stop most of the damage.
What you should do right now: Stop the water source (shut off the main if it’s a pipe, stop the overflow if it’s a toilet). Get a wet vacuum and pull out any standing water you can reach. Open windows. Get air moving. Rent a dehumidifier and air movers. Start NOW.
Hours 6–24: The Absorption Phase
Water’s no longer pooling on the surface—it’s soaking in.
Wood substrates are swelling noticeably now. Concrete’s pores are filled. The moisture levels under your tiles are climbing fast.
You might start noticing soft spots in the floor. The tile might feel slightly spongy when you walk on it. Some people report a barely-there smell—nothing strong yet, just… off.
This is when the real race starts.
Humidity under the tiles is climbing toward 100%. Mold spores are waking up. They’re not growing yet, but conditions are becoming favorable.
If you’re using rental equipment at this stage—dehumidifiers, air movers, moisture meters—you’re still in the game. You can pull moisture out before mold takes hold.
But if you’re waiting, thinking it’ll dry on its own? You’re losing.
What’s happening chemically: Water molecules are bonding with cellulose in wood and calcium in concrete. As they bond, they change the structural properties of both materials. Wood loses strength. Concrete becomes more brittle. Neither recovers fully once this happens.
Hours 24–48: The Mold Window Opens
You’re past the 24-hour mark.
Mold’s germination window is now open. If humidity under your tiles is above 55% and temperature is between 60–80°F (which it probably is), mold’s got everything it needs to start growing.
You still won’t see it. It’s under the tiles, growing on the subfloor, in the grout, maybe on the back of the adhesive layer. Invisible. But active.
The smell is getting stronger now. It’s not overpowering yet, but anyone who walks in notices something. That musty, earthy odor—that’s mold off-gassing. It’s called microbial volatile organic compounds (MVOCs), and it’s a red flag.
If you’ve been running industrial dehumidifiers and air movers non-stop since hour zero, you might still be okay. Moisture levels might be dropping. But if you haven’t started drying, you’re in trouble.
This is the point where most homeowners call a professional. They finally get it—this isn’t a DIY job anymore.
What’s actually happening: Mold colonies need three things: moisture, food (cellulose in wood and drywall), and darkness (they love being under tiles). They’ve got all three. Growth is exponential now—what started as a few spores is becoming visible colonization.
Hours 48–72: Colonization and Spread
Mold’s established now.
It’s not just on the subfloor anymore. If there’s any drywall or wood framing near the tiles, mold’s spreading there too. Mycelium (the root-like structure of mold) is branching out, breaking down organic material as it grows.
The smell is unmistakable at this point. You don’t need to be under the tiles to notice it—you’ll smell it in the room.
If you walk on the floor, it might feel soft or spongy. Tiles might crack or pop because the substrate underneath has lost structural integrity. That’s not just water damage anymore—that’s structural failure.
Wood substrates have absorbed so much water they’re starting to lose load-bearing capacity. If you’ve got joists under there, they’re weakening. If the floor’s starting to sag, that’s a sign the framing’s compromised.
At this stage, DIY equipment won’t cut it. You need professional water restoration with moisture mapping, aggressive dehumidification, and possible substrate removal.
The real cost kicks in here: What could’ve been a $500 equipment rental and some effort is now a $2,000–5,000 professional job. And it’s only going to get worse.
Hours 72+: Structural Damage and Full Remediation
You’re past the 72-hour mark.
Mold’s deep now. It’s in the subfloor, the framing, possibly the insulation. Wood’s structural integrity is compromised. Concrete’s deteriorated.
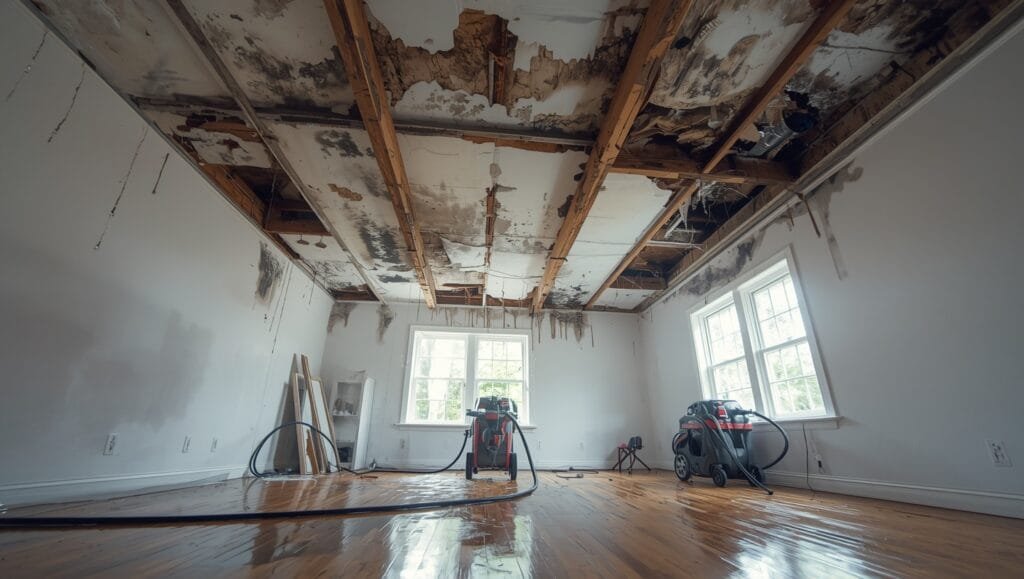
Professional restoration now requires removing tiles, cutting out damaged substrate, treating for mold, completely drying the area, and replacing materials. That’s not a quick fix.
Some homes need partial floor removal. Some need full bathroom or kitchen rebuilds. The timeline stretches from days to weeks. The cost balloons from thousands to tens of thousands.
And here’s the thing—insurance might not cover it if you waited too long or if the damage is deemed “preventable through maintenance.”
Bottom line: Every hour you wait doubles the cost and complexity.
Why Your Dehumidifier Alone Won’t Win This Fight
Let’s be real about equipment for a second.
You rent a standard industrial dehumidifier from a big-box store. It’s maybe 150 pints per day capacity. Sounds impressive, right?
Wrong.
A 150-pint dehumidifier removes about 18 gallons of water per day from the air. But water trapped in materials—wood, concrete, grout—doesn’t evaporate into the air first. It has to migrate out of the material, then evaporate, then get pulled out by the dehumidifier.
That process is slow.
Meanwhile, the moisture under your tiles is just sitting there, deeper than the dehumidifier can effectively reach. The machine pulls moisture from the room’s air, but the trapped water under the tiles stays put.
You need three things working together:
1. Air movement — Floor dryers (air movers) push air across the tile surface and into grout lines. This helps moisture migrate out of the substrate. One dehumidifier alone? It’s not enough.
2. Continuous dehumidification — Once moisture moves into the air, it needs to be pulled out immediately. A standard dehumidifier works, but commercial-grade units are 2–3 times more effective.
3. Moisture monitoring — You need to measure if you’re actually making progress. A moisture meter tells you if levels are dropping or if they’ve stalled. If they’ve stalled, your current setup isn’t working.
Most homeowners rent one dehumidifier, turn it on, and hope. They don’t monitor progress. They don’t adjust their approach. After three days, they think they’re good. Then mold shows up two weeks later.
Pros use multiple dehumidifiers, position air movers strategically based on moisture readings, and check progress daily. They adjust equipment placement based on data—not guesses.
Bottom line: One dehumidifier is better than nothing, but it’s not a complete solution.
The Moisture Meter: Your Crystal Ball for Water Under Tiles
This tool changes everything.
A moisture meter is a handheld device that measures moisture content in materials. You press the pins into tile, grout, or subfloor, and it gives you a reading.
Why does this matter?
Because you can’t see water under tiles. You can’t feel it (not reliably). You can smell it if mold’s growing, but by then you’re already in trouble.
A moisture meter tells you the truth.
When you first discover water, take a baseline reading. Write it down. Check daily. If readings are dropping, your drying strategy is working. If they’re staying the same or increasing, you need to change your approach or call a pro.
Here’s what the readings mean:
0–12%: Dry. Safe zone. Mold won’t grow here.
12–17%: Slightly elevated. Not ideal, but not dangerous yet. Keep drying.
17–25%: Concerning. Mold risk is real. Keep aggressive drying going 24/7.
25%+: Dangerous. Mold’s probably already growing. Call a professional.
Most wood substrates read around 8–12% when they’re dry. Concrete’s higher—usually 3–6% moisture content. If your readings are above those ranges and not dropping after 48 hours of continuous drying, you’ve got a problem that equipment rental won’t solve.
One Rochester homeowner used a moisture meter after renting equipment. He checked on day two and readings were 28%. He’d been running a dehumidifier for 48 hours and nothing had changed. He called JetDry for emergency water damage restoration immediately. They brought in commercial-grade equipment and moisture readings dropped to 14% by day four. If he’d waited another week, the floor would’ve needed replacement.
Bottom line: Without a moisture meter, you’re flying blind.
When Water Under Tiles Spreads Beyond the Obvious Area
Here’s what most people don’t understand.
Water under tiles doesn’t stay in one spot. It spreads.
If water’s trapped under bathroom tiles, it can migrate to adjacent areas—under vanities, into walls, across the subfloor. Grout lines act like highways for water. It follows the path of least resistance.
A slow leak in a pipe under kitchen tiles? The water doesn’t just pool directly under the leak. It spreads across the entire subfloor. By the time you notice soft spots, the damage is already under a large area.
This is why professional water damage inspection matters. Pros use thermal imaging and moisture meters to map out where water’s actually hiding. They find the wet zones you can’t see.
One homeowner in Rochester found water under his kitchen tiles after a dishwasher leak. He thought it was just under the dishwasher. He rented equipment and dried that spot. A month later, mold showed up under the adjacent cabinet. Water had spread six feet across the subfloor. What started as a localized problem became a full kitchen remediation—$12,000 in damage.
If you’re drying water under tiles, check surrounding areas too. Use a moisture meter on the subfloor adjacent to the wet spot. Check the grout lines leading away from the source. Water travels.
Bottom line: Water spreads farther than you think; check surrounding areas before declaring victory.
Grout and Tile Adhesive: The Weak Links That Let Water In
Most water gets under tiles through grout or adhesive failure, not through the tiles themselves.
Tiles are impermeable. Grout isn’t.
Grout is made from cement, sand, and water. It’s porous by nature. Water seeps through it slowly, especially if it’s cracked or wasn’t sealed properly. Over time—months or years—water accumulates under the tiles.
Tile adhesive (also called thinset) is supposed to be waterproof. But if it’s not applied correctly or if it’s the wrong type, water finds its way underneath. Poor installation is one of the biggest causes of water under tiles.
Once water’s under there, it’s trapped between the tile and the adhesive layer. It can’t evaporate naturally because tiles block air from reaching it.
This is why proper tile and grout sealing is critical. A good grout sealer creates a barrier that stops water from seeping through. Quality adhesive and waterproofing membranes prevent water from pooling underneath.
If your tiles are old and you’re dealing with water, the grout’s probably the culprit. Grout degrades over time—it cracks, chunks fall out, sealer wears away. Water finds the weak spots.
After you’ve dried out your current water problem, talk to a contractor about resealing your grout or replacing damaged sections. It’s cheap prevention compared to the cost of water damage remediation.
Bottom line: Grout failure causes most water under tiles; seal it before water finds its way in.
Insurance and Water Under Tiles: What Actually Gets Covered
This is the conversation nobody wants to have, but it matters.
Most homeowner’s insurance policies cover sudden water damage—burst pipes, overflowing toilets, that kind of thing. But they don’t cover slow leaks or water that accumulates because of poor maintenance.
If water’s under your tiles because grout failed over time, insurance probably won’t cover it. That’s considered a maintenance issue.
If water’s under your tiles because of a sudden pipe burst, insurance usually covers it—but only if you act fast and can prove you mitigated damage.
Here’s the key phrase in every policy: “mitigation of damages.” That means you’re responsible for stopping the damage as soon as you discover it. If you delay, insurance might deny your claim or reduce the payout.
Documentation matters too. Take photos of the water. Document when you discovered it and what you did immediately. If you call a professional, get their reports. These prove you acted responsibly.
One homeowner had a pipe burst under his bathroom tiles. Insurance covered the water extraction and restoration—$8,000—because he called a professional immediately and had documentation. His neighbor had the same issue but waited a week to call. Insurance denied his claim because he didn’t mitigate damages fast enough. He paid $14,000 out of pocket.
If you’re unsure about coverage, call your insurance company immediately. Ask about water damage coverage. Ask what documentation they need. Don’t assume you’re covered—confirm it.
Bottom line: Act fast and document everything, or insurance won’t cover water damage.
The Smell Test: Is That Mold Under Your Tiles?
Your nose knows before your eyes do.
Mold produces odors—that musty, earthy smell. It gets stronger as mold colonies grow. If you smell it, mold’s already established.
But here’s the thing—not all water under tiles smells. Early on, it’s just wet. No smell yet. It’s only after mold starts growing (24–48 hours) that you notice the odor.
By then, you’re past the DIY window. You need professional help.
The smell comes from microbial volatile organic compounds (MVOCs). These are gases that mold releases as it breaks down organic material. They’re not harmful on their own, but they’re a signal that mold’s active and growing.
If you smell it, don’t ignore it. Don’t assume it’ll go away if you open a window. Cracking a window doesn’t stop mold from growing under your tiles. It just lets the smell out while the mold keeps spreading.
Call a professional. They can identify whether the smell is actually mold and where it’s coming from. Professional mold remediation services include finding the source, removing contaminated materials, treating the area, and preventing future growth.
Don’t wait for the smell to get worse. That’s how you end up with mold spreading through your entire home.
Bottom line: Smell mold, call a pro—don’t wait for it to get worse.
Quick FAQ: Water Under Tiles Answered
Can water under tiles dry on its own?
Not without help. Tiles block air, so water can’t evaporate naturally. You need active drying—dehumidifiers and air movers—or water will sit and cause damage.
How long does it take to dry water under tiles?
If you catch it in the first 24 hours and use proper equipment, 3–5 days. If you wait longer or water’s spread to a large area, 1–2 weeks. If structural damage has occurred, it could take months.
Will my tiles need to be replaced?
Not necessarily. Tiles themselves are durable. But if the substrate underneath is damaged, you might need to remove tiles to access and repair the subfloor. The tiles can often be reinstalled.
What’s the cheapest way to dry water under tiles?
Rent a dehumidifier ($50–100/day), air movers ($15–25/day each), and a wet vacuum ($20–30/day). Total: $200–300 for three days. But this only works if you catch it early and water hasn’t spread far.
Should I remove my tiles to dry underneath?
Not unless a professional says so. Removing tiles can damage them and the adhesive. Pros only do this if water’s deeply trapped and equipment can’t reach it.
What if I ignore water under my tiles?
Mold grows in 48 hours. Structural damage follows. Eventually, you’re looking at $10,000–25,000 in repairs. Don’t ignore it.
Your Next Move: What to Do Right Now
You’ve got water under your tiles. Here’s what happens next.
In the next hour: Stop the water source. If it’s a burst pipe, shut off the main. If it’s an overflow, fix it. Get a wet vacuum and pull out standing water.
In the next 4 hours: Rent a dehumidifier and air movers. Start them immediately. Open windows. Get air moving through the room.
In the next 24 hours: Check moisture levels with a meter. If they’re dropping, keep going. If they’re stalled or rising, call a professional.
Walt and his team at JetDry have been handling water damage in Rochester for over 20 years. They know every variation of water under tiles—from slow leaks to catastrophic floods. They know what works and what doesn’t.
If you’re past the first 24 hours or if water’s under a large area, don’t gamble. Contact JetDry now and get professional help. They offer 24/7 emergency response and can save you thousands in damage.
Bottom line: Speed beats mold; act now or pay later.
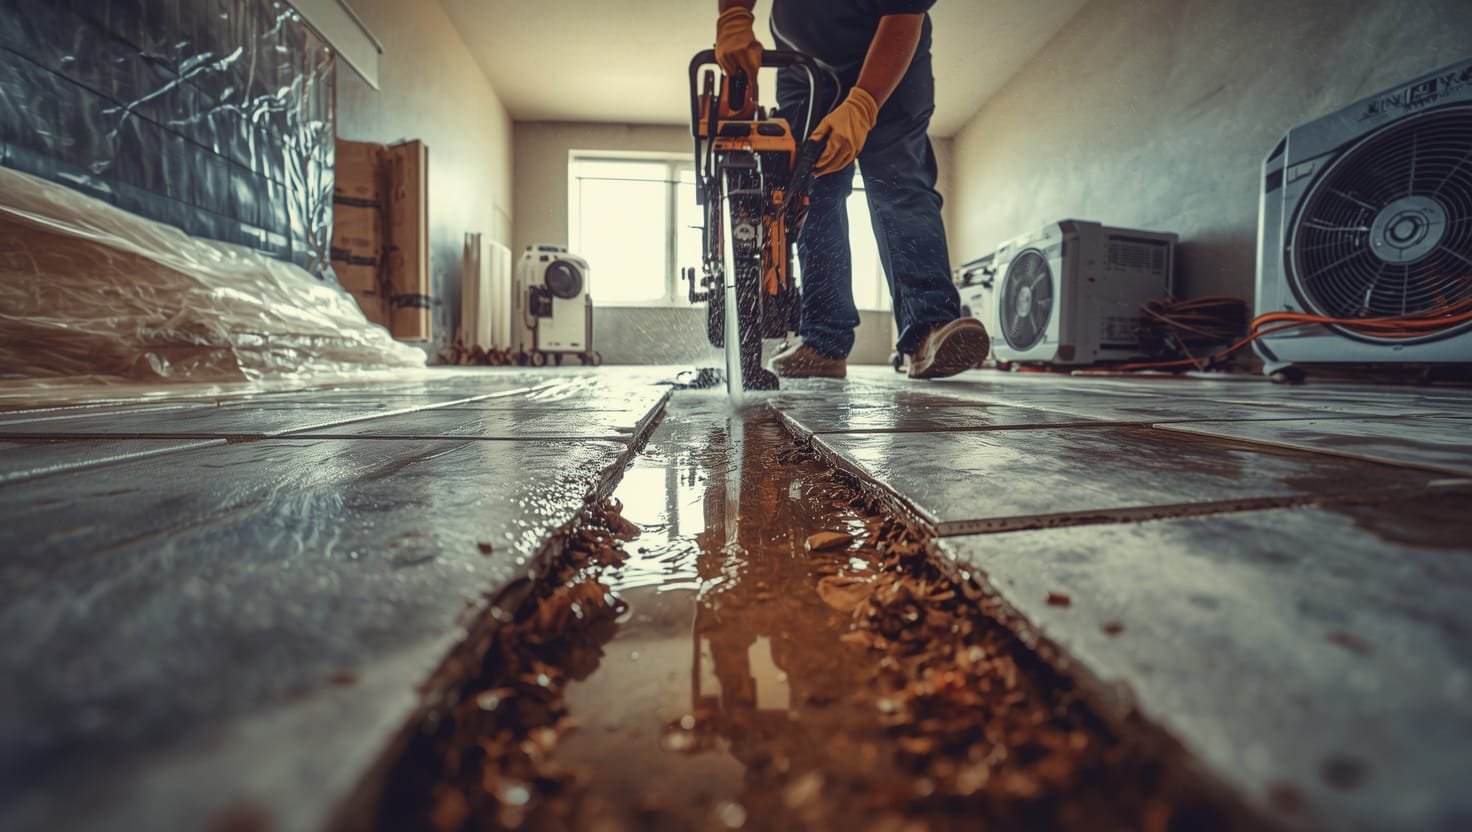
What Happens When You Cut Into Wet Tiles: The Pro Move That Saves Your Floor
Most homeowners panic at the thought of cutting into their tiles.
You just paid for them.
They look nice.
The idea of a pro coming in with a saw and removing sections feels like admitting defeat.
But here’s the truth—sometimes cutting is the only way to win.
Water trapped under tiles doesn’t always respond to dehumidifiers and air movers alone.
If moisture is pooling deep under the substrate, no amount of surface drying will reach it.
The water sits there, hidden, while you think you’re making progress.
Then mold shows up anyway.
Professional restoration teams know when to cut and when to wait.
It’s not reckless—it’s strategic.
Removing a section of tile gives access to the wet substrate underneath.
Pros can then dry it properly, treat it, and reinstall the tiles once everything’s dry.
The cost of cutting and reinstalling is way less than replacing the entire floor.
Bottom line: Strategic tile removal beats hidden moisture damage every time.
The Substrate Under Your Tiles: What’s Actually Holding Everything Up
Your tiles are only as good as what’s underneath them.
Most people don’t think about this until something goes wrong.
Substrates come in different types, and each one reacts to water differently.
Plywood and OSB (Oriented Strand Board)
These are wood-based materials commonly used under tile in kitchens and bathrooms.
They’re affordable and work fine when dry—but water destroys them.
Wood absorbs moisture like a sponge.
Within days, it swells and warps.
Within weeks, it starts to rot.
Fungal decay breaks down the cellulose structure, and the material loses all structural integrity.
A soft spot in your floor under tiles?
That’s rotted plywood.
Once wood reaches that point, it can’t be saved—it has to be replaced.
And that means removing tiles, cutting out the damaged section, installing new substrate, and retiling.
Cost: $2,000–5,000 depending on the area affected.
Concrete Slabs
Concrete seems indestructible, but water messes with it too.
Concrete’s porous—it’s full of tiny air pockets and capillaries.
Water seeps into those pockets and gets trapped.
Trapped water causes concrete to expand and contract with temperature changes.
This expansion creates internal stress, leading to cracking and spalling (surface deterioration).
In freeze-thaw climates like Rochester, this gets worse.
Water freezes, expands, thaws, and repeats—each cycle weakens the concrete more.
The good news: concrete doesn’t rot like wood.
The bad news: once it’s cracked and deteriorated, it’s structurally compromised and repairs are expensive.
Cement Board and Waterproofed Substrates
These are better than plywood for wet areas.
Cement board resists moisture better than wood, and waterproofed options have membranes built in.
But they’re not invincible.
If water gets past the seams or edges, it’ll still pool underneath.
And if the waterproofing membrane is damaged or improperly installed, you’re back to square one.
The difference is that cement board buys you time.
A plywood substrate might fail in weeks; a cement board substrate might hold for months.
But if water’s trapped, it’ll eventually fail too.
Bottom line: Substrate type matters, but water under any substrate means trouble.
Humidity Levels Under Tiles: The Silent Killer Nobody Talks About
Here’s something most people don’t realize—humidity under tiles can stay dangerously high even after the visible water is gone.
You pull out standing water with a wet vacuum.
You run a dehumidifier for a few days.
Everything feels dry.
Then you check with a moisture meter and it still reads 22%.
That’s still in the danger zone.
Humidity under tiles is trapped.
It can’t escape naturally because tiles block airflow.
The only way to lower it is to pull moisture out mechanically—with dehumidifiers—or to increase air circulation so moisture can evaporate and then be removed.
Most DIYers stop drying too early.
They see the floor looks and feels dry, so they assume it’s done.
But “dry to the touch” isn’t the same as “dry enough to be safe.”
A moisture meter reading of 15% or below is safe for wood substrates.
For concrete, you want to get below 3–5%.
If you’re not measuring, you’re guessing—and you’ll lose that bet.
Why High Humidity Kills Substrates Faster Than You Think
Wood at 15–20% moisture content is in the sweet spot for mold.
It’s wet enough to support growth but not so wet that it’s visibly soggy.
Mold loves this zone.
It grows quietly, invisibly, eating away at the structural fibers while everything looks fine from above.
By the time you see discoloration or smell something off, the damage is already deep.
One Rochester homeowner had a slow leak under her kitchen tiles.
She didn’t notice until soft spots appeared in the floor.
When she had it inspected, the subfloor moisture was reading 28%—way above safe levels.
Mold had been colonizing for weeks.
She ended up needing a full kitchen rebuild: $16,000.
If she’d had a moisture meter and checked after day three, she would’ve caught the leak early and saved most of that cost.
Bottom line: Humidity under tiles kills substrates silently; monitor it or lose the floor.
Thermal Imaging: The Game-Changer for Finding Hidden Water
Thermal imaging cameras show temperature differences in materials.
Water absorbs and holds temperature differently than dry materials, so wet areas show up as distinct zones on the thermal image.
This is how pros find water you can’t see.
They scan your floor with a thermal camera and instantly know where moisture is hiding.
It’s not a guess—it’s data.
DIYers don’t have access to this technology (it’s expensive to buy, but rentable for $50–75 a day).
That’s why they often miss water that’s spread beyond the obvious wet spot.
A dishwasher leak under tiles doesn’t just wet the area directly under the dishwasher.
Water travels along the subfloor, following the path of least resistance.
It can spread 5–10 feet in any direction before pooling.
Without thermal imaging, you’re only drying the spot you can see.
The hidden water keeps spreading.
Professionals use thermal imaging as part of their initial assessment.
It tells them exactly how much area is affected and where to focus drying efforts.
If you’re serious about drying water under tiles yourself, rent a thermal camera for a day.
It’ll show you the true extent of the problem.
If the wet area is larger than expected, that’s your signal to call a pro.
Bottom line: Thermal imaging reveals the truth; DIY efforts without it are incomplete.
Grout Sealing After Drying: Preventing Round Two
You’ve dried out the water.
Everything’s back to normal—or so it seems.
But if your grout isn’t sealed, you’re leaving the door open for the same problem to happen again.
Grout is porous.
That’s just how it is.
Water will seep through it given enough time and moisture exposure.
A grout sealer creates a barrier that slows water penetration.
It doesn’t make grout waterproof (nothing really does), but it buys you time.
Water takes weeks to seep through sealed grout instead of days.
That extra time means you’ll catch leaks before they cause damage.
After you’ve dried everything out, talk to a contractor about professional tile and grout sealing.
It’s not expensive—usually $200–500 depending on the area—and it prevents thousands in future damage.
Grout sealer should be reapplied every 1–3 years depending on the product and traffic in the area.
Bathroom tiles need it more often than living room tiles.
Bottom line: Sealed grout stops water before it gets under tiles.
The Drying Timeline: What Realistic Expectations Look Like
You’re not drying water under tiles in a weekend.
That’s not realistic, and anyone who tells you otherwise is selling something.
Here’s what actual drying looks like:
Days 1–2: Extraction Phase
You remove standing water, start dehumidification, and get air moving.
Moisture readings are still high (20%+), but they’re starting to drop.
Days 3–5: Aggressive Drying Phase
Dehumidifiers and air movers are running 24/7.
Moisture readings should be dropping noticeably—down to 15–18% by day five if everything’s working.
If readings have stalled, your current setup isn’t enough.
Days 6–10: Stabilization Phase
Moisture continues dropping slowly.
By day ten, you should be approaching safe levels (15% or below for wood, 3–5% for concrete).
Days 10+: Verification Phase
Take daily moisture readings.
Once you’ve got two consecutive days of the same reading at safe levels, you’re probably done.
Professional teams often speed this up by using multiple dehumidifiers and more aggressive air circulation.
What takes a homeowner two weeks might take pros 3–5 days.
That speed matters because every day you’re drying is a day mold isn’t growing.
Bottom line: Realistic drying takes 1–2 weeks; expect it, plan for it, monitor it.
What Happens If You Ignore the Problem: A Real Cost Breakdown
Let’s talk about what actually happens if you find water under tiles and do nothing.
Day 1: You notice soft spots or a musty smell.
You think, “Maybe it’ll dry on its own.”
Cost so far: $0.
Day 5: The smell’s stronger.
You see slight discoloration on the grout.
You finally rent a dehumidifier.
Cost: $150 equipment rental.
Day 10: Moisture readings aren’t dropping.
You call a pro.
They tell you mold’s already growing under the tiles.
Cost: Professional assessment ($300–500).
Day 15: Mold remediation begins.
They remove the affected tiles, cut out the rotted subfloor, treat for mold, dry everything, replace substrate, and reinstall tiles.
Cost: $4,000–8,000.
Day 30: If the mold spread to adjacent areas or framing, structural repairs might be needed.
Cost: Additional $2,000–5,000.
Total cost of ignoring it: $6,500–13,500.
Compare that to the cost of acting immediately:
Day 1: You stop the water source and start aggressive drying.
Equipment rental: $250.
Day 5: Moisture readings are dropping.
You keep going.
Day 10: Everything’s dry.
No mold, no damage.
Total cost: $250.
That’s a $6,000+ difference for acting fast.
Bottom line: Speed saves money; delay costs thousands.
When to Call JetDry: The Decision Point
You’ve got water under tiles.
You’re trying to figure out if you can handle it yourself or if you need professional help.
Here’s the honest breakdown:
Call a pro immediately if:
- Water’s under a large area (more than 50 square feet).
- You can’t locate the water source.
- You notice a musty smell (mold’s already growing).
- The floor feels soft or spongy.
- It’s been more than 24 hours since you discovered the water.
- You don’t have access to a moisture meter.
You can try DIY if:
- You caught it within the first few hours.
- Water’s localized to a small area (under 20 square feet).
- You can identify and stop the source immediately.
- You have access to rental equipment and a moisture meter.
- You’re willing to monitor progress daily and adjust if needed.
Even if you meet all the DIY criteria, be honest with yourself.
If you’re not comfortable running equipment 24/7 for a week, or if you’re unsure about moisture readings, just call a pro.
Walt Latuik and his team at JetDry have been handling water damage in Rochester for over 20 years.
They’ve seen every variation of water under tiles—from slow leaks to burst pipes to foundation cracks.
They know exactly what to do and can get it done right the first time.
If you’re in Rochester and water’s under your tiles, contact JetDry now for a 24/7 emergency assessment.
They’ll tell you if it’s DIY-able or if you need their team.
Bottom line: When in doubt, call a pro; they save money and your floor.
FAQ: Water Under Tiles Answered
Can I paint over wet tiles to seal them?
No—water will just get trapped underneath the paint and keep causing damage underneath. You have to dry the substrate first.
Will opening windows and running a fan work?
It helps, but it’s not enough for water trapped under tiles. You need a dehumidifier pulling moisture out of the air continuously.
How do I know if mold’s already growing?
Smell it first (musty odor), then check with a moisture meter. Readings above 20% for more than 48 hours usually mean mold’s started.
Will my homeowner’s insurance pay for this?
Depends on the cause. Burst pipes? Usually yes. Slow leak from poor maintenance? Usually no. Check your policy or call your agent immediately.
Do I need to replace all my tiles?
Not always. Tiles themselves are durable. If only the substrate’s damaged, pros can remove tiles, replace the substrate, and reinstall the original tiles.
How much does professional drying cost?
Typical water extraction and drying runs $1,200–2,500 for a small bathroom or kitchen area. Mold remediation, if needed, adds $800–1,500+.
Bottom line: Act fast, monitor progress, call a pro if unsure.